
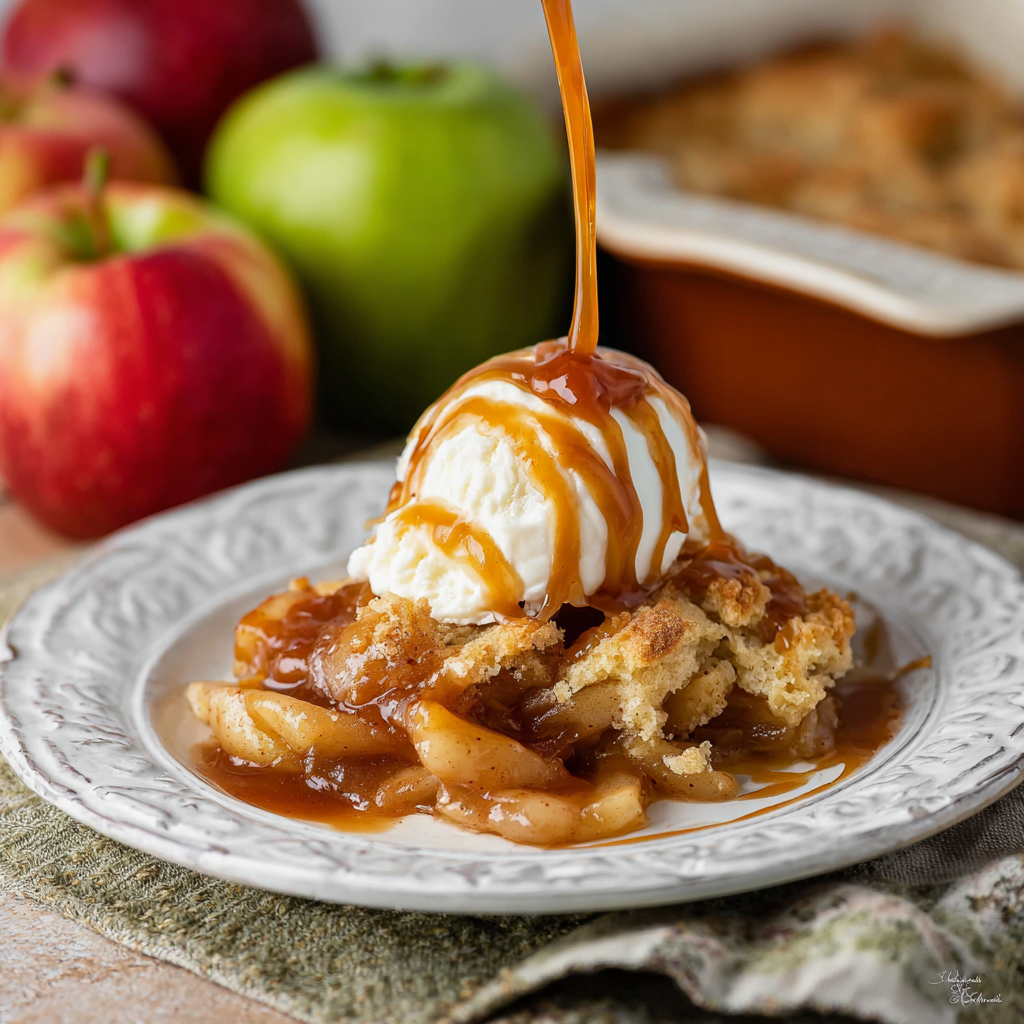
Caramel Apple Cobbler

Warm, bubbling apples baked beneath a tender, buttery batter and finished with a ribbon of caramel — an easy crowd-pleasing dessert that tastes like fall in every bite.
This caramel apple cobbler has been one of my favorite desserts to bring to family gatherings and chilly Sunday suppers for years. I first developed this version on an overcast October afternoon when my pantry held a jar of caramel sauce and a stack of crisp apples that needed using. The result was so comforting — tart apple slices softened in their own juices and caramel, topped with a quick, biscuit-like batter that bakes into a golden, tender crust — that it instantly became a seasonal staple in our house. The contrast of warm fruit and cold vanilla ice cream makes it impossible not to smile.
What I love most is how forgiving and fast this is. The apples are simply peeled and sliced, tossed with sugars and spices, and the batter comes together in one bowl with no rolling or chilling needed. Baking in a 9x13 pan yields a generous amount for sharing, and leftovers reheat beautifully. I often make it for last-minute guests because it looks and tastes like I spent hours fussing, when in fact it comes together in under an hour.
Why You'll Love This Recipe
- This comes together in about 20 minutes of active prep and 35 to 40 minutes in the oven, making it ideal for weeknight dessert or weekend baking.
- It uses pantry staples and common apples like Granny Smith and Honeycrisp; no specialty flours or exotic ingredients required.
- The batter is simple and forgiving: no creaming, no chilling, and it bakes into a tender, slightly cakey topping that soaks up apple juices beautifully.
- Make-ahead friendly: assemble up to a day ahead and bake when ready, or freeze the unbaked dish for later baking.
- Crowd-pleasing finish: warm cobbler with a drizzle of caramel and a scoop of vanilla ice cream appeals to kids and adults alike.
- Flexible for dietary swaps: easy to adapt with dairy-free butter substitutes or gluten-free flour blends if needed.
I remember serving this at a small fall dinner; my brother took a bite and declared it the closest thing to apple pie without the work of making a double crust. Friends have gone home with the recipe, and my kids request it the week the first apples appear in the market. The caramel adds a grown-up depth of flavor without being cloying, and the mix of tart and sweet apples gives the filling a lively balance.
Ingredients
- Apples (6 medium): Choose a mix of tart and sweet, such as Granny Smith and Honeycrisp. Look for firm apples without soft spots; the combination keeps texture and bright flavor as the fruit cooks.
- Granulated sugar (1/2 cup): Provides sweetness and helps macerate the apples. Use regular granulated sugar; cane or caster will work similarly.
- Brown sugar (1/2 cup): Adds moisture and a subtle molasses note that complements the caramel. Light brown sugar is my go-to for this dish.
- Cinnamon (1 teaspoon) and nutmeg (1/2 teaspoon): Ground spices warm the filling. Use freshly ground nutmeg if possible for the best aroma.
- Salt (pinch): Balances sweetness and enhances all the flavors; don’t omit.
- Caramel sauce (1/2 cup plus extra): Use a good-quality store-bought sauce or homemade salted caramel. Reserve extra for drizzling when serving for more visual appeal and flavor.
- Butter (1/2 cup, melted): Adds richness to the topping. Unsalted is preferred so you control salt levels; if using salted, reduce the added pinch of salt slightly.
- All-purpose flour (1 cup): Forms the structure of the topping. For a more tender result, spoon and level the flour into the cup when measuring.
- Baking powder (1 teaspoon): Gives lift to the topping, creating a light, cake-like crumb.
- Milk (1/2 cup): Any medium-fat milk (whole or 2 percent) yields a tender batter. For a dairy-free swap, use unsweetened almond or oat milk.
- Vanilla extract (1 teaspoon): Brightens the batter and complements the caramelized apple flavors.
Instructions
Preheat and Prepare: Preheat the oven to 350 degrees Fahrenheit. Generously grease a 9x13-inch baking dish with butter so the cobbler will release easily after baking. A ceramic or glass dish works well and allows you to watch the apples bubble. Toss the Apples: In a large bowl, combine the peeled and sliced apples with 1/2 cup granulated sugar, 1/2 cup brown sugar, 1 teaspoon cinnamon, 1/2 teaspoon nutmeg, a pinch of salt, and half of the caramel sauce (about 1/4 cup). Toss gently until every slice is evenly coated. This step both seasons the apples and draws out some juices that will mingle with the caramel as it bakes. Spread the Fruit: Spread the coated apple slices in an even layer in the prepared baking dish. Press them down slightly so they are compact but not squashed. Even distribution ensures consistent cooking and bubbling across the pan. Make the Batter: In a separate bowl, whisk together 1 cup all-purpose flour, 1 teaspoon baking powder, and a small pinch of salt. Stir in the melted butter, 1/2 cup milk, and 1 teaspoon vanilla until a thick batter forms. The batter should be pourable but substantial; if too thick, add a tablespoon more milk. Do not overmix to keep the topping tender. Top the Apples: Pour the batter evenly over the apples and spread gently with a spatula if needed. Do not stir it into the apples; the batter will bake into a golden crust while the apples steam and bubble underneath. Bake: Bake in the preheated oven for 35 to 40 minutes until the topping is golden brown and a knife inserted into the center comes out clean or with just a few moist crumbs. You should see the apples bubbling around the edges — that bubbling is your sign that the fruit is cooked through and saucy. Finish and Rest: Remove from the oven and immediately drizzle with the remaining caramel sauce. Let the dish rest for about 10 minutes to set slightly; this makes serving neater and allows flavors to meld. Serve warm with a scoop of vanilla ice cream or a dollop of whipped cream.
You Must Know
- This packs well: store cooled leftovers in an airtight container in the refrigerator for up to 4 days or freeze portions for up to 3 months; thaw overnight in the fridge before reheating.
- High in comforting calories: a generous serving with ice cream will deliver a rich dessert — adjust portions if you are watching intake.
- Fruit texture: a mix of firm and sweet apples gives the best contrast; purely soft apples can become mushy when baked.
- Salted caramel is a great balance: using salted caramel or adding a tiny sprinkle of flaky sea salt after drizzling intensifies flavor.
What I love about this dish is the way it makes the whole house smell like fall. Each time I pull it from the oven, neighbors peek in the kitchen. My mother taught me to let desserts cool a touch before serving; that brief rest makes the filling thick enough to scoop neatly and ensures the topping has the best texture. This is the dessert I bring to potlucks when I want to look like a pro without the time investment of lattice crusts or pastry.

Storage Tips
Store leftovers covered tightly with foil or in an airtight container in the refrigerator for up to four days. For longer storage, cut into individual portions and freeze on a tray until firm, then transfer to a freezer bag for up to three months. To reheat, thaw overnight in the refrigerator and warm in a 325 degree Fahrenheit oven for 10 to 15 minutes until heated through, or microwave a single portion for 60 to 90 seconds. To preserve topping texture when reheating, tent with foil so the topping warms without drying out.
Ingredient Substitutions
If you need dairy-free options, swap melted butter for an equal amount of a vegan stick butter or coconut oil and use unsweetened almond or oat milk. For gluten-free needs, replace the all-purpose flour with a 1-to-1 gluten-free baking blend that contains xanthan gum. If you prefer less sweetness, reduce the granulated sugar by 2 tablespoons or the brown sugar by 2 tablespoons. To add complexity, a splash of apple brandy or dark rum mixed into the apple filling before baking elevates the flavor.
Serving Suggestions
Serve warm scoops with high-quality vanilla ice cream or softly whipped cream. For a grown-up touch, finish with a sprinkle of toasted chopped pecans and a drizzle of extra caramel sauce. Pair with black coffee or a lightly spiced chai for balance. For brunch, serve small portions alongside baked brie and maple-glazed bacon for a sweet-savory spread. Garnish with a few thin apple slices fanned on top to make it look intentional and elegant.
Cultural Background
Apple desserts are a cornerstone of North American and European home baking traditions, with cobblers tracing their roots to early colonists who adapted British puddings and pastry-less fruit desserts to pantry-friendly preparations. The method of pouring batter over fruit and allowing it to bake into a topping — rather than encasing fruit in a pastry — was practical for frontier kitchens and became a comforting, rustic staple. Adding caramel is a modern American twist that layers in the flavors of brown sugar and butter likely used in older recipes but concentrated here as a sauce.
Seasonal Adaptations
In fall, use a blend of tart and sweet apples and boost warm spices like cardamom or allspice. For winter holidays, fold in 1/2 cup chopped dried cranberries or cherries to the apple mix and finish with toasted walnuts. In summer, lighten the topping by substituting half the butter with Greek yogurt and use summer apples or pears for a different texture. For a festive Thanksgiving table, bake in individual ramekins for single-serving presentations.
Meal Prep Tips
To prep ahead, assemble the apple layer and make the batter, then cover the unbaked pan tightly and refrigerate up to 24 hours. If freezing unbaked, assemble the dish, cover with plastic wrap and foil, and freeze; when ready, bake from frozen adding 10 to 15 minutes to the bake time and tenting with foil if the topping browns too quickly. Label containers with date and baking instructions so you can pull a prepped dessert with confidence on busy nights.
There is something deeply satisfying about a dessert that feels both nostalgic and effortless. This caramel apple cobbler is one of those recipes that becomes part of family traditions — a simple way to celebrate apples, caramel, and the joy of sharing warm food with people you love. Make it your own by tweaking spices, apples, or serving styles and watch it earn its place in your regular rotation.
Pro Tips
Use a mix of tart and sweet apples to balance texture and flavor; Granny Smith and Honeycrisp are ideal.
If the topping browns too fast, tent loosely with foil during the last 10 minutes of baking.
Let the cobbler rest 10 minutes after baking so the filling sets and is easier to serve.
This nourishing caramel apple cobbler recipe is sure to be a staple in your kitchen. Enjoy every moist, high protein slice — it is perfect for breakfast or as a wholesome snack any time.
FAQs about Recipes
Can I assemble this ahead of time?
Yes. Prepare and assemble the cobbler, cover tightly, and refrigerate for up to 24 hours. Add a few extra minutes to baking time if the dish goes into the oven cold.
Can I make this gluten-free?
Use a 1-to-1 gluten-free flour blend that contains xanthan gum. The texture will be slightly different but still delicious.
Tags
Caramel Apple Cobbler
This Caramel Apple Cobbler recipe makes perfectly juicy, tender, and flavorful steak every time! Serve with potatoes and a side salad for an unforgettable dinner in under 30 minutes.
Ingredients
Apple Filling
Topping
Instructions
Preheat and prepare pan
Preheat oven to 350 degrees Fahrenheit and grease a 9x13-inch baking dish with butter so the cobbler releases easily after baking.
Combine apples and sugars
In a large bowl, toss peeled and sliced apples with granulated sugar, brown sugar, cinnamon, nutmeg, a pinch of salt, and half of the caramel sauce until evenly coated.
Arrange apples in dish
Spread the coated apples in an even layer in the prepared baking dish, pressing slightly to compact but not crush the slices.
Make the batter
Whisk flour, baking powder, and a pinch of salt. Stir in melted butter, milk, and vanilla until a thick batter forms; do not overmix.
Top and bake
Pour the batter evenly over the apples without stirring. Bake 35 to 40 minutes until top is golden and apples are bubbling at the edges.
Finish and serve
Remove from oven, drizzle with remaining caramel sauce, and let rest for 10 minutes before serving warm with vanilla ice cream or whipped cream.
Last Step: Please leave a rating and comment letting us know how you liked this recipe! This helps our business to thrive and continue providing free, high-quality recipes for you.
Nutrition
Did You Make This?
Leave a comment & rating below or tag
@aiolirecipe on social media!
Categories:
You might also like...

Fall Harvest Pasta Salad
A cozy, colorful salad that celebrates autumn flavors — roasted butternut squash and Brussels sprouts tossed with pasta, cranberries, pecans, and tangy feta, finished with a balsamic vinaigrette.

Cilantro Lime Steak Bowls
Bright, tangy cilantro-lime marinated flank steak served over rice with black beans, corn, fresh veggies and creamy avocado for a fast, healthy weeknight bowl.

Pecan Pie Crescent Rolls
Buttery crescent rolls filled with a sweet pecan pie–inspired filling — a quick, crowd-pleasing dessert perfect for holidays or weeknight cravings.
Did You Make This?
Leave a comment & rating below or tag @aiolirecipe on social media!
Rate This Recipe
Share This Recipe
Enjoyed this recipe? Share it with friends and family, and don't forget to leave a review!
Comments (1)
This recipe looks amazing! Can't wait to try it.
Comments are stored locally in your browser. Server comments are displayed alongside your local comments.
Hi, I'm Olivia!
What's Popular

30-Minute Meals!
Join to receive our email series which contains a round-up of some of our quick and easy family favorite recipes.