
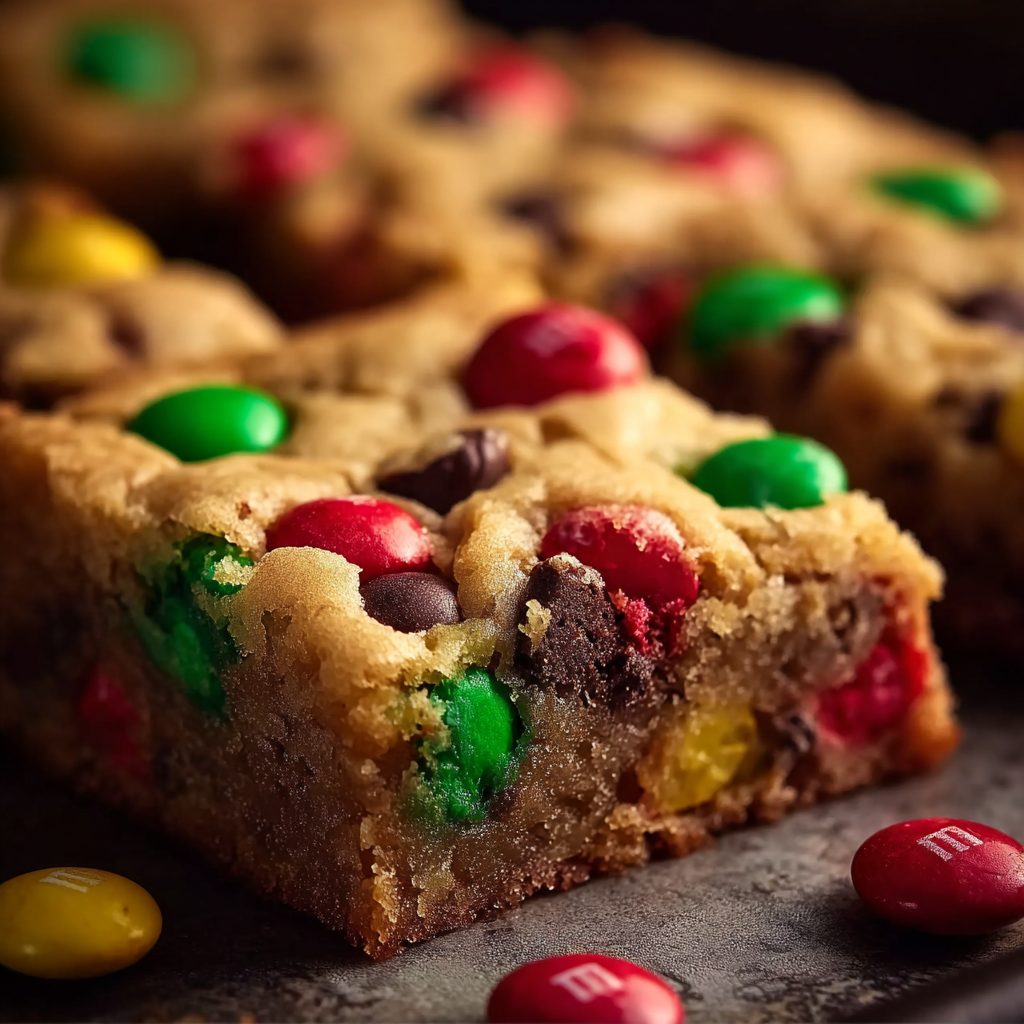
Christmas M&M Cookie Bars

Soft buttery cookie bars packed with chocolate chips and holiday colored candies that are perfect for gift plates and festive gatherings.

This recipe began as a simple idea for a holiday treat and quickly became a family requirement every December. I first tested these cookie bars on a snowy afternoon when I needed a sturdy, sliceable sweet that would travel well to a neighbor party. The result was a soft, almost cake like interior with a golden edge and a scatter of festive candies that made everyone smile. The texture sits between a cookie and a blondie which makes these bars forgiving to slice and generous to share. They bend the rules of a cookie while delivering all the comfort of a classic chocolate chip bite.
I learned early that the right balance of brown sugar and butter gives these bars their tender chew while a little extra candy adds crunch and seasonal color. Over the years I tweaked the bake time and the candy ratio until both kids and adults were reaching for seconds. These bars are the sort of recipe I bring when I want something cheerful and uncomplicated. They are forgiving to make, can be dressed up or simplified, and they keep well for gifting. If you like a soft center and crisp edges with holiday colored chocolate candies on top these will be on repeat in your kitchen.
Why You'll Love This Recipe
- The make ahead friendly formula can be prepared the day before and baked the next day which saves time on busy holiday mornings.
- Ready in about 35 minutes from start to finish with about 15 minutes active work time so it is perfect for last minute trays.
- Uses pantry basics like flour butter eggs and both granulated and brown sugar making it easy to shop with few specialty items required.
- Child friendly mixing and decorating give kids a safe role in the kitchen which makes it a great holiday activity.
- Adaptable mix in quantity means you can add more chocolate chips or candies depending on how sweet and colorful you want the bars to be.
- The bars transport well and stack without falling apart which makes them ideal for potlucks bake sales and gift boxes.
My family reaction the first time I brought these to a holiday potluck was immediate. A neighbor asked for the recipe on the spot and a cousin requested them for her office week. They are the kind of treat that sparks little bursts of nostalgia every bite long after the season ends.
Ingredients
- Unsalted butter one cup softened Use good quality butter at room temperature for even creaming. I prefer a European style butter when possible because it adds a richer flavor but standard unsalted works well and gives you control of salt level.
- Granulated sugar one cup Provides structure and helps the edges brown. If you prefer less sweetness reduce by two tablespoons but final texture will be slightly softer.
- Brown sugar one cup packed Adds moisture and chew. Light brown sugar is ideal for a milder molasses note. The packed measurement ensures a consistent chewy texture.
- Eggs two large Bring to room temperature for better incorporation and a more even crumb. They help bind the batter and produce a tender interior.
- Vanilla extract two teaspoons Pure vanilla is preferable for depth of flavor. Avoid imitation if you can for a cleaner aromatic note.
- All purpose flour two and three quarter cups Scoop and level for accurate measure. Spoon the flour into the cup and level with the back of a knife to avoid a dense result.
- Baking soda one teaspoon Provides a gentle lift that keeps the bars slightly airy without making them cake like.
- Salt half teaspoon Enhances sweetness and balances flavors. If using salted butter omit additional salt.
- Chocolate chips one cup Use semi sweet or a mixture of semi sweet and milk for the best contrast to the candies.
- Holiday colored chocolate candies one to one and a half cups Choose red green and white candies for a seasonal look. Reserve a few to press on top for a polished surface before baking.
Instructions
Step one Preheat and prepare the panPreheat the oven to three hundred and fifty degrees Fahrenheit. Line a nine by thirteen inch baking pan with parchment leaving a bit of overhang on two sides to lift the bars out easily. Grease the parchment lightly with a sweep of butter or nonstick spray so the bottom releases cleanly.Step two Cream butter and sugarsIn a large bowl beat the softened butter with both sugars until light and fluffy about two to three minutes with an electric mixer on medium speed. Scrape the bowl to ensure even creaming. This step traps air that helps the interior stay tender yet structured.Step three Add eggs and vanillaBeat in the eggs one at a time then add the vanilla and mix until combined. Do not overmix after adding eggs to avoid a tough crumb. The batter will look glossy and slightly loose which is expected.Step four Combine dry ingredientsWhisk the flour baking soda and salt together in a separate bowl to ensure even distribution of leavening. Add the dry ingredients to the wet mixture in two additions folding gently until no streaks of flour remain. Over mixing will develop gluten and make the bars dense.Step five Fold in chips and candiesFold in one cup of chocolate chips and one cup of the holiday candies reserving extras to press on top. Folding keeps the batter tender and distributes mix ins without crushing the candies.Step six Spread into pan and decorateSpread the batter evenly into the prepared pan using an offset spatula for a smooth top. Scatter the reserved candies and a few extra chips across the surface pressing them gently so they adhere but do not sink.Step seven Bake and testBake at three hundred and fifty degrees Fahrenheit for eighteen to twenty two minutes until the edges are golden and a toothpick inserted near the center comes out with a few moist crumbs. Rotate the pan halfway through baking if your oven has hot spots.Step eight Cool and sliceAllow the bars to cool completely in the pan on a wire rack about one hour before lifting them out with the parchment overhang. For cleaner slices chill the pan for thirty minutes then slice with a sharp knife wiped between cuts.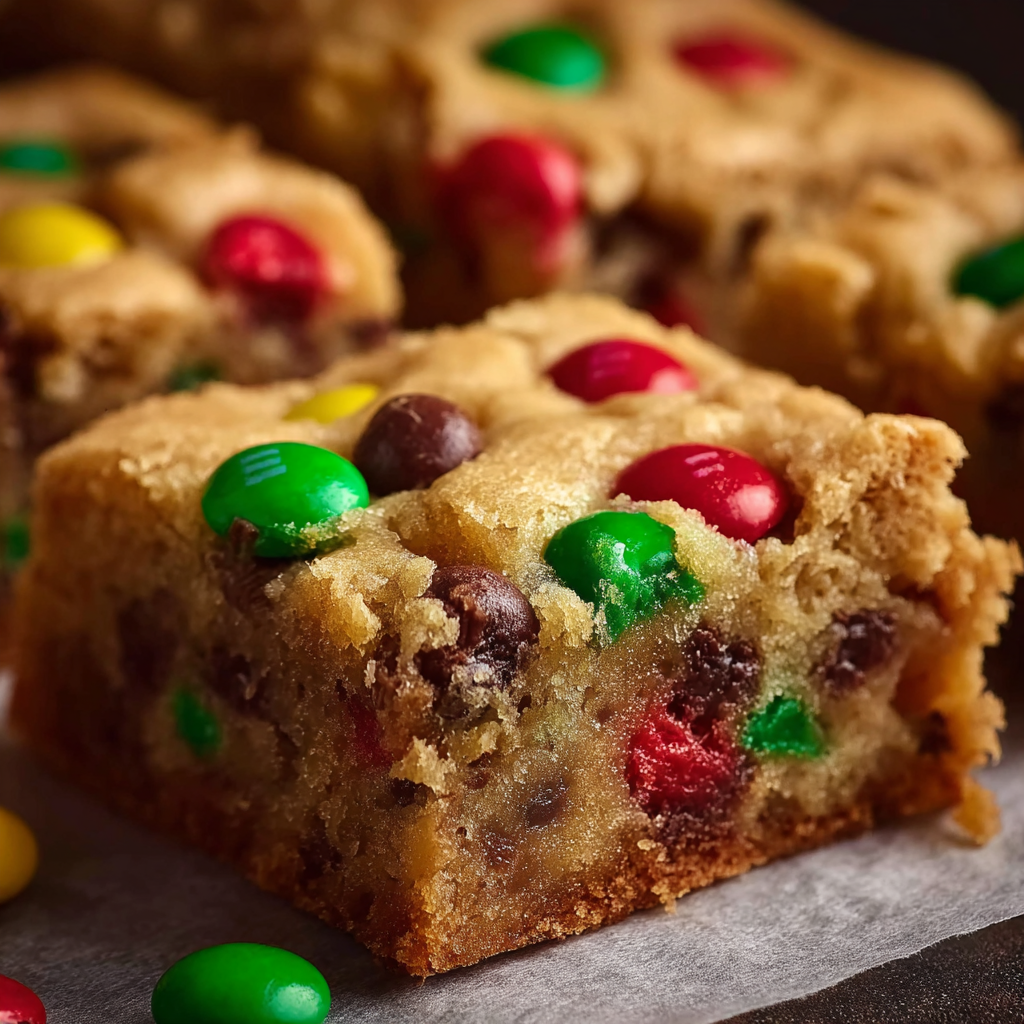
You Must Know
- The bars freeze well wrapped twice in plastic wrap and stored in a freezer safe container for up to three months.
- They are high in calories and sugar so portioning two inch squares keeps servings reasonable.
- Letting the bars cool completely prevents the candies from melting into the top layer which keeps a bright festive look.
- These are not suitable for those with nut allergies if you use certain brands of candies so always check labels and consider allergy friendly chocolate chips.
What I love most about these bars is how they invite conversation. I have delivered them to cookie swaps and found neighbors swapping memories of similar treats from their childhood. A simple change of candy color can transform them into a birthday or team spirit treat which makes them a versatile addition to my baking rotation.
Storage Tips
Store the bars at room temperature in an airtight container layered with parchment paper for up to three days. For longer storage refrigerate up to one week wrapped tightly to prevent them from drying out. To freeze wrap first in plastic wrap and then in foil. Thaw overnight in the refrigerator then bring to room temperature before serving. Reheat single portions for ten to fifteen seconds in the microwave to restore a freshly baked feel but avoid overheating which will melt the candies.
Ingredient Substitutions
If you need to change ingredients you can use half brown sugar and half coconut sugar for a deeper caramel note but the color will be darker. For dairy free swap the butter for a dairy free stick margarine measured cup for cup and choose dairy free chocolate chips. For egg free use a commercial egg replacer following package instructions or use two tablespoons of ground flaxseed mixed with six tablespoons of water as a binder though texture will be slightly more cake like.
Serving Suggestions
These bars are ideal on a cookie plate paired with peppermint bark and shortbread for a festive spread. Serve warm with a scoop of vanilla ice cream for a cozy dessert. For a party display stack bars on a platter and dust lightly with powdered sugar. Garnish individual squares with a small sprig of mint or rosemary to add a savory contrast and give them a holiday look.
Cultural Background
Colorful candy studded sweets are an American holiday tradition that blends the familiar comfort of cookie bars with the playful look of coated chocolate candies. The idea of pressing candy on top of baked goods became popular with the rise of widely available candies in the mid twentieth century. These bars echo the same spirit found in classic melt in your mouth cookies but updated for communal sharing and modern baking ease.
Seasonal Adaptations
Change the color of the candies to match the season. Use pastels for spring celebrations or orange and black for autumn gatherings. Add a teaspoon of ground cinnamon and a quarter teaspoon of nutmeg for a warm winter variation. For a summer twist fold in dried cherries and swap half the chips for white chocolate for a bright tart and sweet contrast.
Meal Prep Tips
For batch prep make two pans at once and freeze one. Bake the second pan later and you will always have fresh bars for unexpected guests. Cut the frozen pan into portions and store individually wrapped for single serve gifts. Label containers with baking date and intended thaw method to keep serving efficient during busy holiday weeks.
These bars are a small celebration in every bite and they invite sharing which is the best part of holiday baking. Try the recipe once and adjust candy ratios to your family preference then bake again because they disappear quickly.
Pro Tips
Bring eggs to room temperature for even mixing and a more uniform crumb
Press reserved candies gently on top before baking to keep colors vibrant
Chill the pan briefly before slicing to get clean edges
Use parchment with overhang to lift the bars out of the pan easily
This nourishing christmas m&m cookie bars recipe is sure to be a staple in your kitchen. Enjoy every moist, high protein slice — it is perfect for breakfast or as a wholesome snack any time.
FAQs about Recipes
Can I freeze the cookie bars?
Yes wrap cooled bars tightly and freeze for up to three months. Thaw overnight in the refrigerator before serving.
How long will they stay fresh?
They should keep fresh at room temperature for three days or refrigerated up to one week.
Tags
Christmas M&M Cookie Bars
This Christmas M&M Cookie Bars recipe makes perfectly juicy, tender, and flavorful steak every time! Serve with potatoes and a side salad for an unforgettable dinner in under 30 minutes.
Ingredients
Base
Mix ins
Instructions
Preheat and prepare the pan
Preheat the oven to 350 degrees Fahrenheit. Line a 9 by 13 inch pan with parchment leaving an overhang on two sides and lightly grease the parchment.
Cream butter and sugars
Beat softened butter with granulated and brown sugar until light and fluffy about two to three minutes scraping the sides of the bowl for even creaming.
Add eggs and vanilla
Beat in eggs one at a time then add vanilla. Mix until combined but avoid over mixing to keep the texture tender.
Combine dry ingredients
Whisk flour baking soda and salt together then add to wet ingredients in two additions folding gently until no streaks of flour remain.
Fold in chips and candies
Fold in chocolate chips and one cup of candies reserving extras for the top to maintain bright color after baking.
Spread into pan and bake
Spread batter evenly into the prepared pan press reserved candies on top and bake at 350 degrees Fahrenheit for 18 to 22 minutes until edges are golden and a toothpick shows moist crumbs.
Cool and slice
Cool completely on a wire rack about one hour then lift from pan using the parchment overhang for clean slicing. Chill before slicing for the best presentation.
Last Step: Please leave a rating and comment letting us know how you liked this recipe! This helps our business to thrive and continue providing free, high-quality recipes for you.
Nutrition
Did You Make This?
Leave a comment & rating below or tag
@aiolirecipe on social media!
Categories:
You might also like...

Fall Harvest Pasta Salad
A cozy, colorful salad that celebrates autumn flavors — roasted butternut squash and Brussels sprouts tossed with pasta, cranberries, pecans, and tangy feta, finished with a balsamic vinaigrette.

Cilantro Lime Steak Bowls
Bright, tangy cilantro-lime marinated flank steak served over rice with black beans, corn, fresh veggies and creamy avocado for a fast, healthy weeknight bowl.

Pecan Pie Crescent Rolls
Buttery crescent rolls filled with a sweet pecan pie–inspired filling — a quick, crowd-pleasing dessert perfect for holidays or weeknight cravings.
Did You Make This?
Leave a comment & rating below or tag @aiolirecipe on social media!
Rate This Recipe
Share This Recipe
Enjoyed this recipe? Share it with friends and family, and don't forget to leave a review!
Comments (1)
This recipe looks amazing! Can't wait to try it.
Comments are stored locally in your browser. Server comments are displayed alongside your local comments.
Hi, I'm Olivia!
What's Popular

30-Minute Meals!
Join to receive our email series which contains a round-up of some of our quick and easy family favorite recipes.