
Christmas Present Brownies

Fudgy, chocolatey brownies decorated like tiny wrapped gifts—an easy, joyful holiday treat that’s perfect for parties, cookie exchanges, or edible gifts.
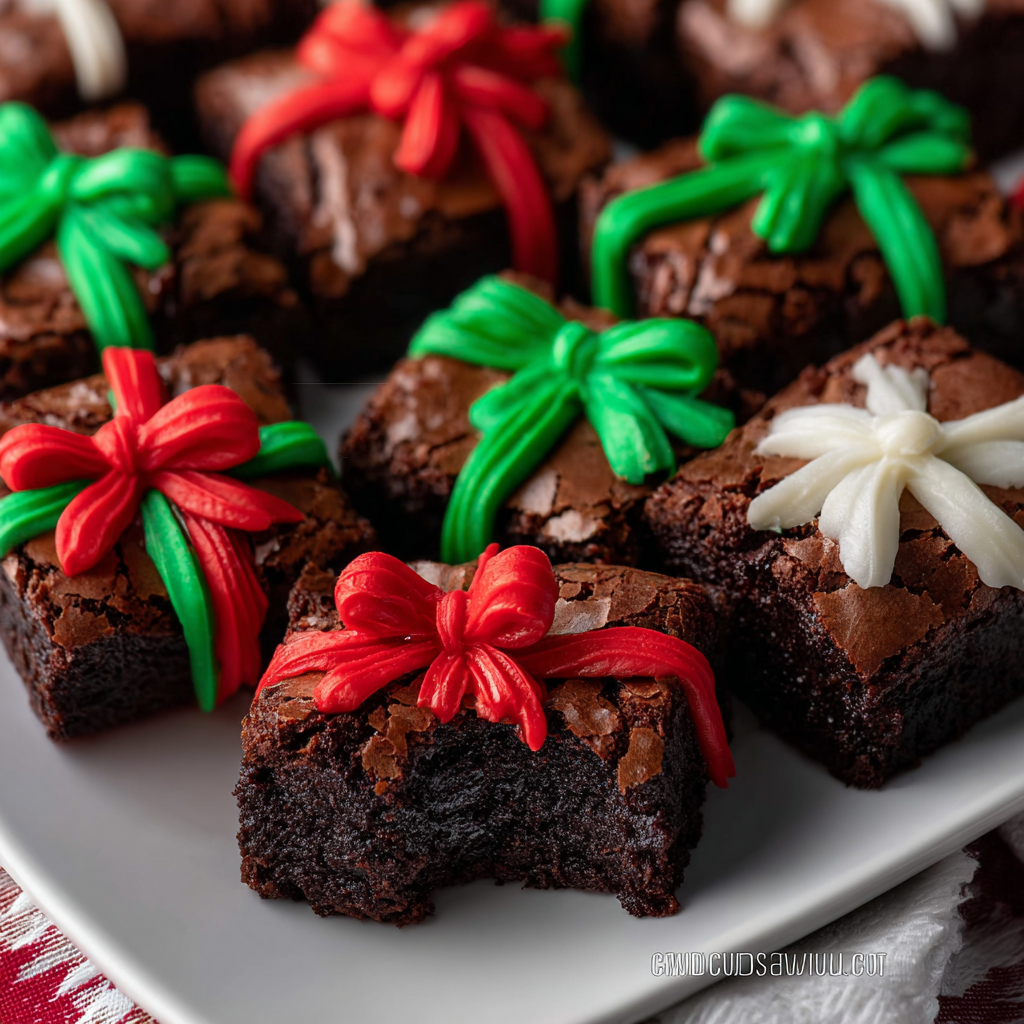
This recipe for Christmas Present Brownies has become my seasonal go-to for holiday gatherings. I first made them during a snowy December when I wanted something that looked festive without hours of decorating. The idea of turning a classic fudgy brownie into a tiny wrapped present felt delightfully whimsical, and friends loved the playful presentation as much as the rich chocolate. The texture is dense and chewy with a glossy top, and the candy-melt ribbons add a crisp, sweet contrast that makes each bite feel like a holiday celebration.
I discovered this version by adapting a simple melt-and-mix brownie base and adding a few decorating tricks to make each square resemble a small gift. Because the base is straightforward—melted butter, sugar, eggs, vanilla, and dry ingredients—you’ll be able to prepare the batter quickly and focus on the fun finishing touches. These are ideal for making ahead, transporting to parties, or packaging in small boxes as edible presents. They travel well and almost everyone admires the little candy bows before tucking into the chocolaty goodness.
Why You'll Love This Recipe
- Fast to assemble: the batter comes together on the stove and in one bowl, so you can have these in the oven in under 15 minutes and ready to decorate within an hour.
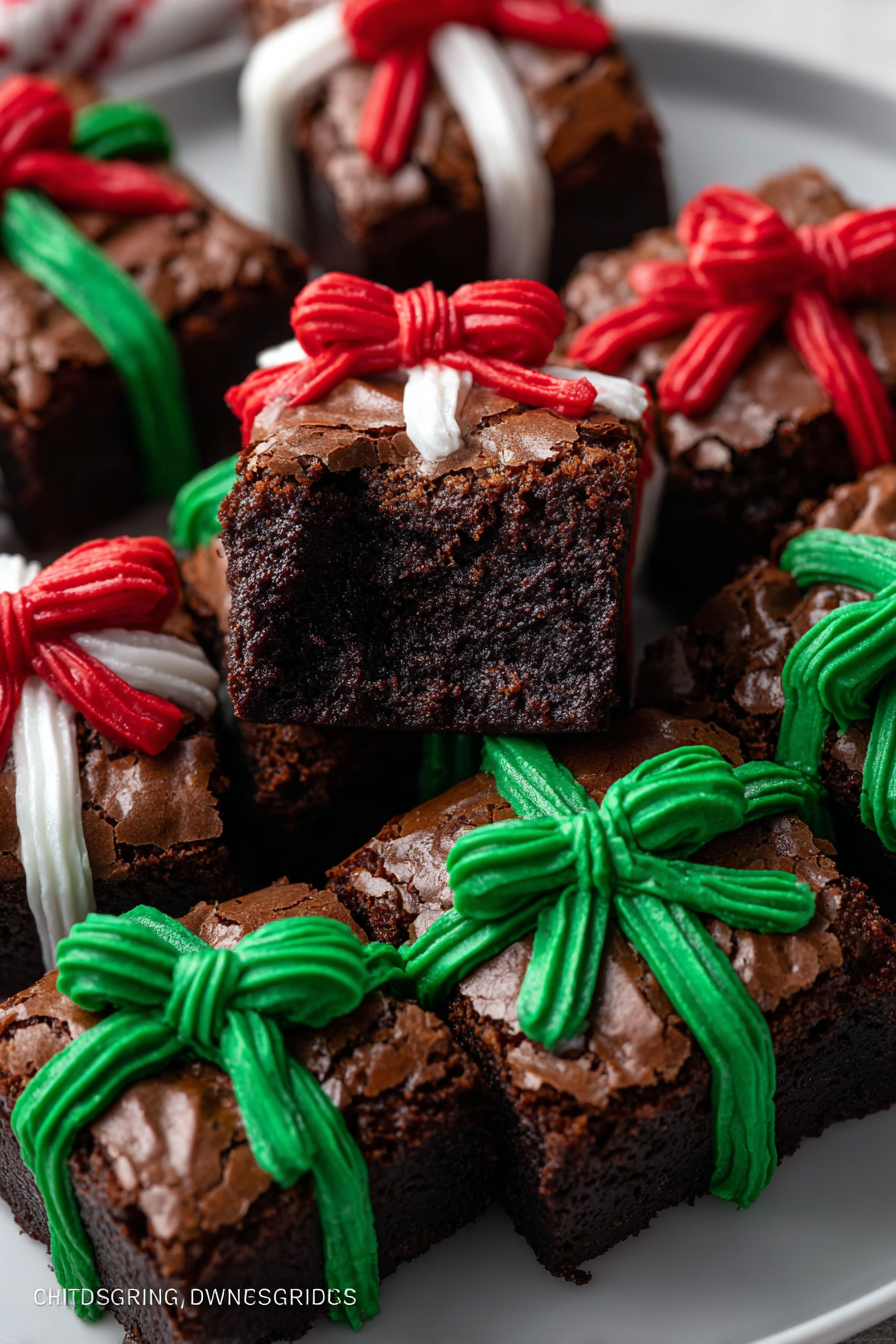
- Fudgy, not cakey: the recipe balances butter, sugar, and eggs to produce a dense, gooey texture that stays moist for days when stored properly.
- Festive finish: red, green, and white candy melts let you create beautiful ribbon patterns and mini bows for an instantly holiday-ready look.
- Kid-friendly decorating: piping candy melts is an easy activity for young helpers—no advanced skills required and the results always look charming.
- Perfect for gifting: they cut neatly into even squares and fit beautifully in small boxes lined with parchment paper.
- Customizable: fold in semi-sweet chocolate chips for extra gooey pockets, or swap toppings for nut allergies and dietary needs.
When I first served these at a work holiday potluck, coworkers mistook them for boutique bakery treats. My grandmother insisted I write down the method because she wanted to make these for her bridge club. The simple yet thoughtful presentation earns compliments every time, and the recipe never fails to evoke warm holiday conversation.
Ingredients
- Unsalted butter (1 cup / 2 sticks): I use real butter for flavor and glossy top. Room-temperature unsalted butter melts evenly; brands like Land O'Lakes or Plugrá give reliably rich results.
- Granulated sugar (2 cups): This contributes to the shiny crust when combined with melted butter. Cane sugar works well—avoid altering with brown sugar unless you want a chewier, slightly caramel flavor.
- Large eggs (4): Eggs provide structure and richness. Use large eggs at room temperature so they emulsify easily into the warm butter-sugar mixture.
- Vanilla extract (1 teaspoon): Pure vanilla adds depth—Madagascar bourbon vanilla is my preference for a warm, rounded note.
- All-purpose flour (1 cup): Spoon and level when measuring to avoid dense brownies. King Arthur or Bob's Red Mill are reliable options.
- Unsweetened cocoa powder (1 cup): Choose a good-quality natural cocoa or Dutch-processed depending on desired intensity; natural offers brighter chocolate notes.
- Baking powder (1/2 teaspoon) and salt (1/4 teaspoon): Small amounts help balance flavor without leavening too much; this keeps the texture fudgy rather than cake-like.
- Semi-sweet chocolate chips (1 cup, optional): Fold in for extra pockets of molten chocolate—Ghirardelli or Nestlé Toll House are classics.
- Red, green, and white candy melts: These are used for decoration and are widely available in craft stores or grocery baking aisles.
- Mini candy bows or holiday sprinkles (optional): Tiny edible bows or festive sprinkles give a polished gift-like finish.
Instructions
Prepare the pan and oven:Preheat the oven to 350°F (175°C). Line a 9x13-inch baking pan with parchment paper leaving an overhang on two opposite sides for easy lifting after baking. This small prep step ensures clean removal and even cooling.Melt butter and combine with sugar:In a medium saucepan over low heat, melt 1 cup (2 sticks) unsalted butter until just liquid. Remove from heat and immediately whisk in 2 cups granulated sugar until glossy and smooth—this dissolves some sugar and promotes a shiny top crust. Let the mixture cool for 2–3 minutes so it doesn’t scramble the eggs when added.Add eggs and vanilla:Whisk in the 4 large eggs one at a time, whisking constantly until the batter becomes thick, glossy, and slightly ribbon-like. Stir in 1 teaspoon vanilla extract. The eggs should be fully incorporated; the batter will look elastic and shiny—this is a key visual cue for the proper emulsion.Sift and fold dry ingredients:In a separate bowl, sift together 1 cup all-purpose flour, 1 cup unsweetened cocoa powder, 1/2 teaspoon baking powder, and 1/4 teaspoon salt. Gradually fold the dry mix into the wet batter with a rubber spatula, folding only until combined to avoid overworking the gluten. If using 1 cup of semi-sweet chocolate chips, fold them in at the end for gooey pockets.Transfer and bake:Pour the batter into the prepared 9x13 pan and smooth the surface. Bake on the center rack for 30–35 minutes. Start checking at 28 minutes—insert a toothpick in the center; it should come out with a few moist crumbs but not wet batter. Avoid overbaking to retain fudginess—the brownies will continue to set as they cool.Cool and unmold:Allow the pan to cool completely on a wire rack. Then use the parchment overhang to lift the slab from the pan and place it on a cutting board. Cooling completely before decorating helps the candy melts to set cleanly and prevents the toppings from sinking into warm brownies.Cut, decorate, and set:Cut into even squares with a sharp knife or a bench scraper for straight edges. Melt the red, green, and white candy melts in separate bowls in 15-second microwave bursts, stirring until smooth. Use a small piping bag or a resealable plastic bag with the corner snipped to pipe crisscross lines like ribbon. Add mini bows or sprinkles, then let the candy set at room temperature or chill for 10–15 minutes to speed up hardening.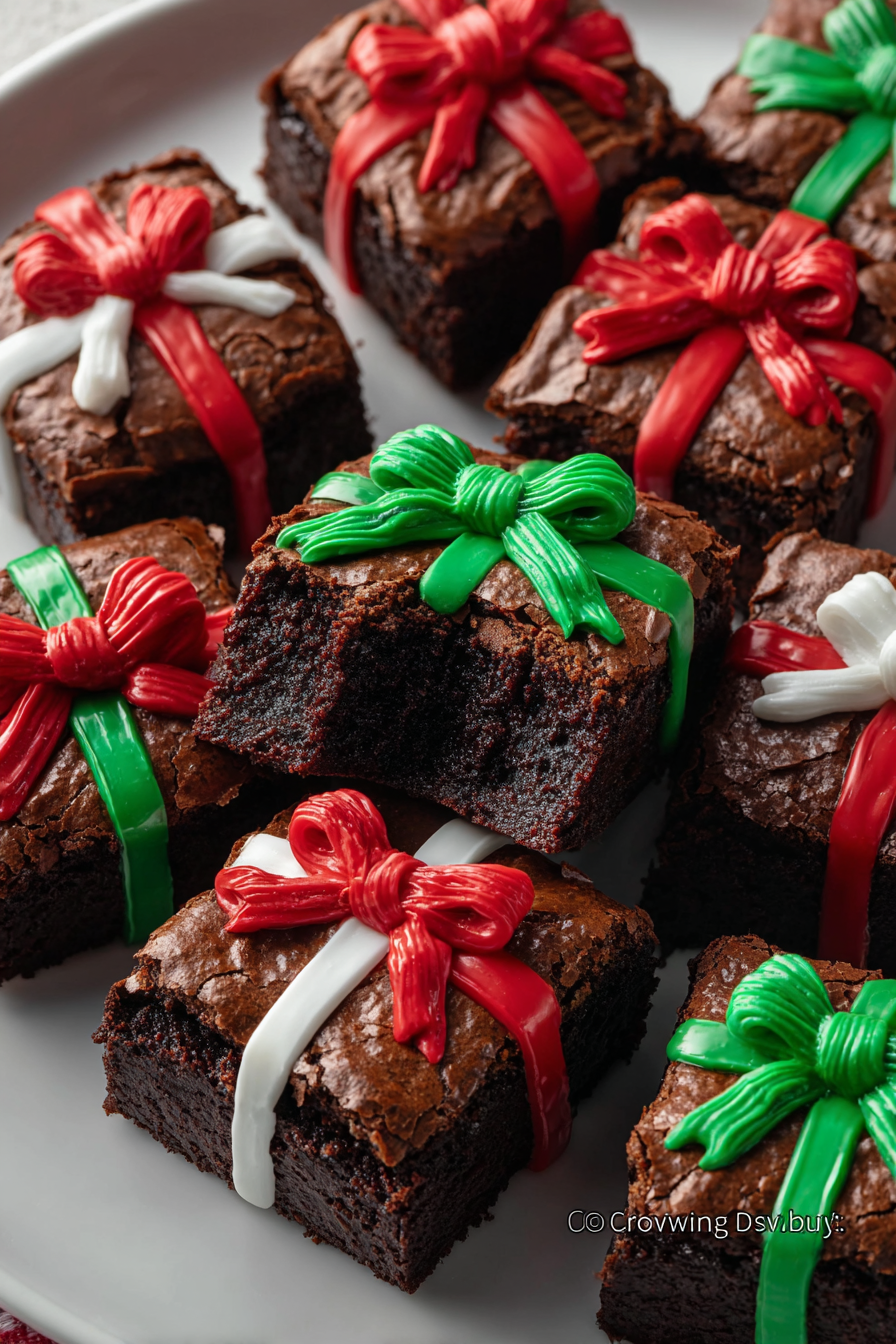
You Must Know
- Storage: these keep well at room temperature for 2 days in an airtight container, refrigerated up to 7 days, or frozen for 2–3 months if tightly wrapped.
- Texture tip: underbaking slightly yields fudgier brownies; watch the toothpick and remove when moist crumbs remain.
- Decorating tip: warm candy melts briefly if they thicken while piping; use short bursts and stir between bursts.
- Allergens: contains eggs, butter (dairy), wheat, and possibly soy from chocolate—see allergy note below for substitutions.
My favorite thing about these brownies is the reaction when someone unwraps a square—it’s playful and surprising. Over the years I’ve brought them to neighborhood cookie swaps and holiday classroom parties; parents always appreciate a treat that looks special but is fast to make. They’re one of the few holiday items that reliably disappear first.
Storage Tips
Store cut brownies in a single layer in an airtight container with parchment between layers to prevent sticking. At room temperature they stay moist for 48 hours; refrigeration extends freshness to about a week but can slightly firm the chocolate—bring to room temperature before serving for best mouthfeel. For longer storage, wrap tightly in plastic wrap and foil, then freeze for up to three months. Thaw overnight in the refrigerator or at room temperature for a few hours, then allow decorated tops to breathe for 10–15 minutes to avoid condensation buildup.
Ingredient Substitutions
Swap unsalted butter for salted if that’s what you have—reduce added salt slightly. For a dairy-free version, use a plant-based stick butter alternative and dairy-free chocolate chips; flavor will be slightly different but still delicious. To make gluten-free squares, replace the all-purpose flour with a 1-for-1 gluten-free flour blend that contains xanthan gum; texture may be a touch more delicate. If avoiding food dyes, use white chocolate melted with a tiny amount of natural beet powder for red and matcha powder for green ribbons, though consistency will differ from candy melts.
Serving Suggestions
Serve these as a centerpiece on a holiday dessert platter with powdered sugar dusted around like snow. Pair with a simple hot cocoa or espresso to balance the sweetness. For a grown-up twist, serve alongside spiced mulled wine or a glass of tawny port. Garnish with a tiny mint leaf or edible gold dust for a more elegant presentation if giving as gifts to adults. They also work well alongside cookies and truffles on a party table for visual variety.
Cultural Background
Brownies are a distinctly American creation dating back to the late 19th and early 20th centuries, originally showcasing dense chocolate bars ideal for lunchboxes and bake sales. Over time they evolved into many regional variations—fudgy, cakey, nut-studded, or swirled with caramel. Turning them into mini gifts taps into a broader tradition of edible holiday gifting that blends Victorian-era decorative sweets with modern, playful presentation. This adaptation celebrates that DIY spirit, pairing the classic chocolate base with festive candy techniques borrowed from confectionery decorating.
Seasonal Adaptations
For winter, add warm spices like 1/4 teaspoon cinnamon or a pinch of cardamom to the batter for cozy notes. In spring, swap candy melts for pastel colors and tiny fondant flowers. For a Thanksgiving twist, stir in 1/2 cup chopped toasted pecans and pipe warm caramel ribbons. For a New Year’s party, use metallic sprinkles and dark chocolate ganache instead of candy melts. Each season’s swap keeps the core easy method intact while tailoring flavors and looks to the occasion.
Meal Prep Tips
Make the brown base up to two days ahead and keep it in the pan, covered with plastic wrap in the refrigerator; come back to cut and decorate on the day you’ll serve. Alternatively, freeze uncut and wrapped for up to three months, then thaw and decorate after cutting. For efficient gifting, cut and place brownies in mini bakery boxes lined with parchment, stack with tissue paper separators, and tie with ribbon. If transporting long distances, pack in a shallow box with padding to prevent shifting and cover minimally so the candy ribbons don’t smear.
Making these Christmas Present Brownies is a joyful way to share homemade treats during the holidays. They’re fast to prepare, fun to decorate, and always bring smiles when served—try them with a cup of coffee or a festive beverage and watch how they brighten the season.
Pro Tips
Whisk eggs into slightly cooled butter-sugar mixture to prevent scrambling and produce a glossy top.
Use parchment overhang to lift the baked slab cleanly from the pan for neat cutting.
Pipe candy melts with a small tip or a snipped plastic bag for consistent ribbon thickness.
Check for moist crumbs on a toothpick to avoid overbaking and retain fudginess.
Warm candy melts in short bursts and stir frequently to avoid burning.
This nourishing christmas present brownies recipe is sure to be a staple in your kitchen. Enjoy every moist, high protein slice — it is perfect for breakfast or as a wholesome snack any time.
FAQs about Recipes
Can I decorate brownies while they're still warm?
Allow brownies to cool completely before decorating; warm brownies will cause candy melts to slide and decorations to sink.
Can these be frozen?
Yes, freeze uncut brownies wrapped tightly for up to three months. Thaw before decorating for best results.
How can I accommodate common allergens?
If you need them to be dairy-free or gluten-free, swap butter for plant-based sticks and use a 1-for-1 gluten-free flour blend.
Tags
Christmas Present Brownies
This Christmas Present Brownies recipe makes perfectly juicy, tender, and flavorful steak every time! Serve with potatoes and a side salad for an unforgettable dinner in under 30 minutes.
Instructions
Preheat and prepare pan
Preheat oven to 350°F (175°C). Line a 9x13-inch pan with parchment paper leaving overhang for easy removal.
Melt butter and mix with sugar
Melt 1 cup (2 sticks) unsalted butter in a medium saucepan over low heat. Remove from heat and whisk in 2 cups granulated sugar until smooth and glossy. Cool briefly.
Whisk in eggs and vanilla
Whisk in 4 large eggs one at a time until the mixture is thick and glossy. Stir in 1 teaspoon vanilla extract.
Combine dry ingredients and fold
Sift together 1 cup flour, 1 cup cocoa powder, 1/2 teaspoon baking powder, and 1/4 teaspoon salt. Fold into wet mixture until combined; do not overmix. Optionally fold in 1 cup semi-sweet chocolate chips.
Bake until fudgy
Pour batter into prepared pan and bake 30–35 minutes. Test with a toothpick—remove when a few moist crumbs cling to it. Cool completely.
Cut and decorate like presents
Lift slab using parchment, cut into even squares. Melt candy melts in separate bowls and pipe crisscross ribbons on each square. Add mini bows or sprinkles and let set.
Last Step: Please leave a rating and comment letting us know how you liked this recipe! This helps our business to thrive and continue providing free, high-quality recipes for you.
Nutrition
Did You Make This?
Leave a comment & rating below or tag
@aiolirecipe on social media!
Categories:
You might also like...

Fall Harvest Pasta Salad
A cozy, colorful salad that celebrates autumn flavors — roasted butternut squash and Brussels sprouts tossed with pasta, cranberries, pecans, and tangy feta, finished with a balsamic vinaigrette.

Cilantro Lime Steak Bowls
Bright, tangy cilantro-lime marinated flank steak served over rice with black beans, corn, fresh veggies and creamy avocado for a fast, healthy weeknight bowl.

Pecan Pie Crescent Rolls
Buttery crescent rolls filled with a sweet pecan pie–inspired filling — a quick, crowd-pleasing dessert perfect for holidays or weeknight cravings.
Did You Make This?
Leave a comment & rating below or tag @aiolirecipe on social media!
Rate This Recipe
Share This Recipe
Enjoyed this recipe? Share it with friends and family, and don't forget to leave a review!
Comments (1)
This recipe looks amazing! Can't wait to try it.
Comments are stored locally in your browser. Server comments are displayed alongside your local comments.
Hi, I'm Olivia!
What's Popular

30-Minute Meals!
Join to receive our email series which contains a round-up of some of our quick and easy family favorite recipes.