
Christmas Red Velvet Cheesecake

A festive red velvet creamy filling on a chocolate cookie crust topped with whipped cream and sprinkles. Perfect for holiday gatherings and make ahead celebrations.
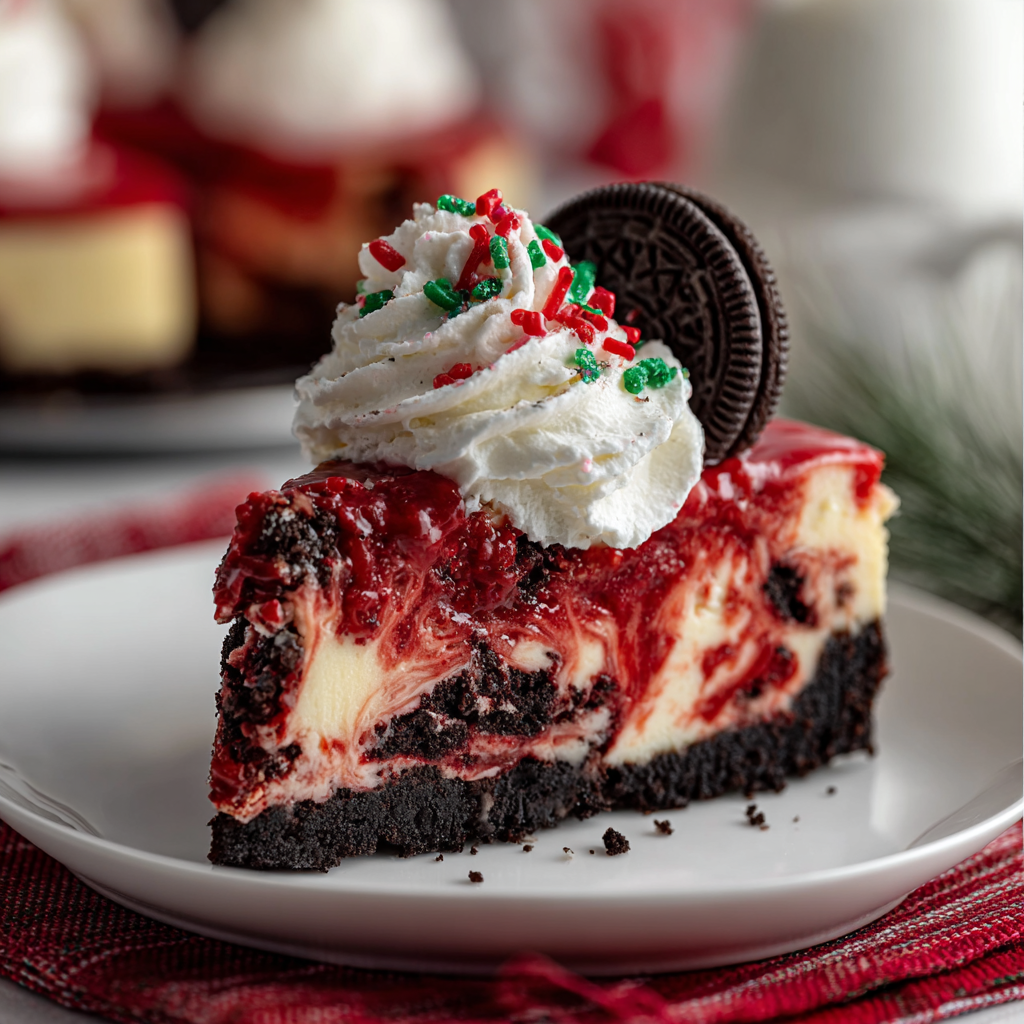
This Christmas red velvet cheesecake has been a centerpiece at holiday tables in my family for years. I first created this version during a December when I wanted something bright and festive that combined two beloved treats, red velvet and a creamy baked filling. The result is a silky, slightly tangy filling with a whisper of cocoa and a deep red color that feels celebratory yet comforting. Every bite delivers a contrast between the crunchy chocolate crust and the velvet smooth filling flecked with colorful sprinkles that make it feel like a party.
I discovered the particular balance of texture and color after a few experiments with cream cheese proportions and a touch of cocoa to anchor the red. What makes this recipe special is how reliably it sets when baked in a water bath, resulting in clean slices and a center that is tender but not wet. It holds well for holiday guests and stores beautifully for several days which makes it ideal for entertaining. If you love classic red velvet cake but want something richer and creamier for a special occasion this version delivers on both presentation and flavor.
Why You'll Love This Recipe
- Shows beautifully on a holiday table with deep red filling and festive sprinkles for instant seasonal appeal.
- Combines pantry friendly staples like Oreo cookies and cream cheese so you can assemble it without specialty shopping.
- Make ahead friendly so you can bake the day before and refrigerate overnight to save time on the day of entertaining.
- Water bath baking creates a silky texture and prevents cracks so each slice looks bakery worthy.
- Quick crust that bakes in ten minutes and a simple whipped cream folding technique keeps the filling light and airy.
- Child friendly and crowd pleasing so it fits family parties and more formal gatherings alike.
In my house this dessert always gets a second round of compliments. The kids love the sprinkles and mini cookies on top and my older relatives appreciate the restrained sweetness. Over the years I refined the cocoa amount and the whipping technique so the filling never feels heavy. I also learned to bake in a water bath and to let the oven cool gradually to avoid cracks which has been a game changer for presentation and texture.
Ingredients
- Chocolate cookie crust: 24 Oreo cookies about 2 cups of finely crushed crumbs. Use classic Oreo for the best chocolate flavor and to keep assembly easy. The cookie crumbs provide a sweet crunchy base that contrasts the creamy filling.
- Butter: 1 third cup melted unsalted butter. Melted butter binds the crumbs and becomes a firm crust when chilled and baked. I often use Land O Lakes or a quality salted stick and reduce added salt elsewhere.
- Cream cheese: Four 8 ounce blocks softened to room temperature. Full fat cream cheese like Philadelphia gives the smoothest texture and the richest mouthfeel in the filling.
- Sugar: One half cup plus 2 tablespoons of white granulated sugar split between crust and filling. The sugar balances the tang of the cheese and the slight bitterness of the cocoa.
- Heavy whipping cream: Two cups cold heavy cream. One cup is whipped and folded into the filling to lighten it for a mousse like texture.
- Vanilla: One teaspoon pure vanilla extract to round flavors.
- Cocoa: Two tablespoons unsweetened cocoa powder. A little cocoa keeps the red from tasting too artificial and adds depth.
- Red food coloring: As needed to reach a vibrant red. Gel color gives a stronger hue without thinning the filling.
- Christmas sprinkles: Quarter cup for folding into the filling and extra for garnish. Choose sprinkles that hold up to baking for best texture.
- Toppings: Whipped cream mini Oreos and extra sprinkles for garnish. These add height and a playful finish when serving.
Instructions
Prepare the pan and crust Preheat the oven to 350 degree Fahrenheit. Wrap a 9 inch springform pan tightly with heavy duty aluminum foil so water from the bath cannot seep in. Crush 24 Oreo cookies to fine crumbs using a food processor or a rolling pin in a sealed bag. Stir the crumbs with one third cup melted butter and 2 tablespoons of sugar until evenly moistened. Press the mixture firmly and evenly into the bottom of the prepared pan using the back of a measuring cup to compact it. Bake for eight to ten minutes until fragrant then cool completely on a wire rack. Make the filling With a stand mixer fitted with the paddle or with a hand mixer beat the softened cream cheese until completely smooth about two to three minutes scraping the bowl once. Gradually add one half cup sugar and beat until just combined to avoid incorporating excess air. Mix in one teaspoon vanilla and two tablespoons unsweetened cocoa powder to balance the color and flavor. Add red food coloring a little at a time until you reach a vibrant shade of red. In a separate chilled bowl whip one cup of the heavy cream to soft peaks then fold gently into the cream cheese mixture using a spatula to keep the texture light. Fold in a quarter cup Christmas sprinkles evenly so they are distributed without overworking the filling. Pour the filling onto the cooled crust and smooth the top with an offset spatula. Bake in a water bath Reduce the oven temperature to 325 degree Fahrenheit. Place the foil wrapped springform pan into a larger roasting pan. Carefully pour hot water into the roasting pan until it reaches halfway up the sides of the springform. This gentle moist heat ensures even cooking and prevents cracks. Bake for one hour to one hour and fifteen minutes until the edges are set and the center still jiggles slightly when tapped. Avoid over baking to keep the center creamy. Cool gradually and chill Turn off the oven and leave the cheesecake inside with the door ajar for one hour to cool slowly. Remove the pan from the water bath and cool completely on a wire rack for two to three hours. Run a thin knife around the outer edge to loosen then cover loosely and refrigerate for at least six to eight hours preferably overnight for best texture and clean slices. Serve and garnish Remove the springform pan sides and top with whipped cream. Garnish with mini Oreos and extra Christmas sprinkles for a festive finish. For clean slices heat a sharp knife under hot water wipe it dry and make each cut wiping the blade between slices.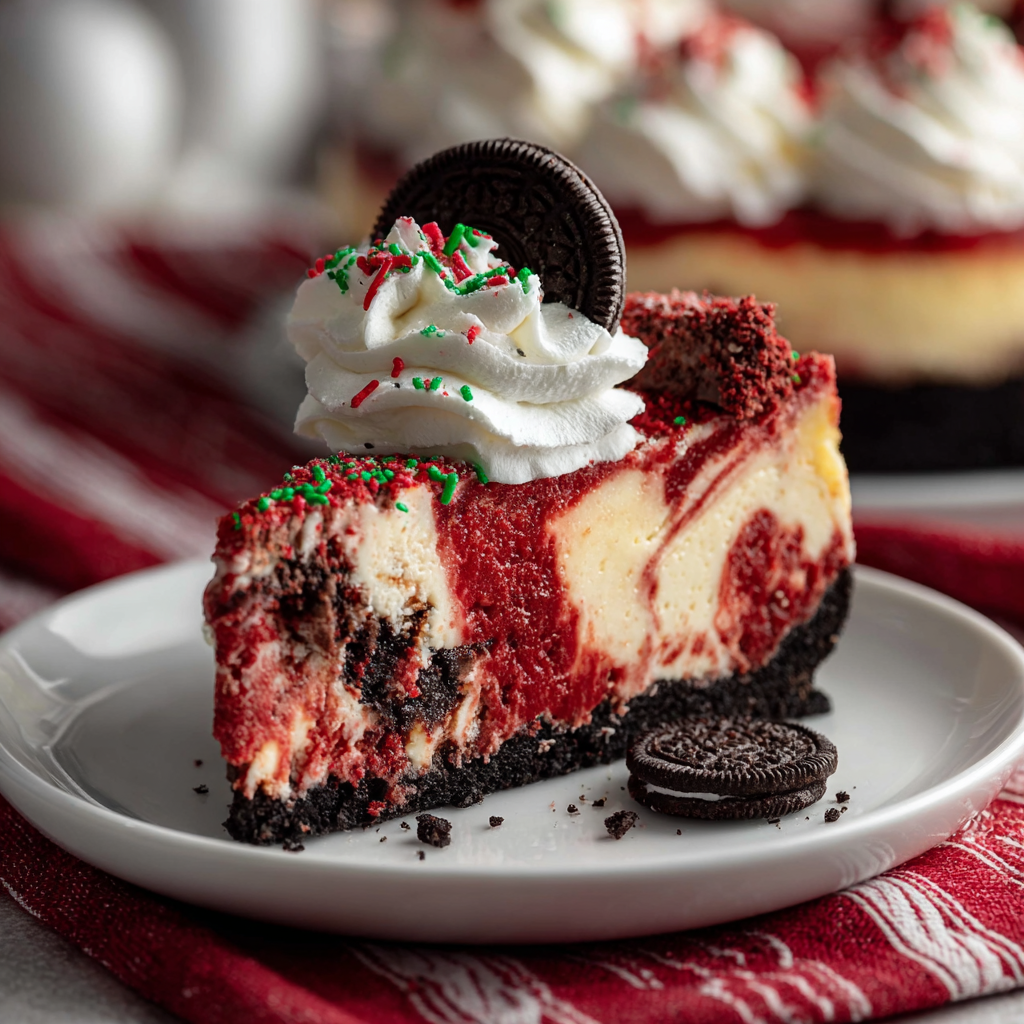
You Must Know
- The water bath is essential to get a crack free top and a creamy center that sets without becoming dry.
- Use full fat cream cheese for the smoothest texture and avoid over beating after sugar is added to reduce air pockets.
- Gel food coloring produces a strong red hue with less liquid so the filling consistency remains stable.
- Leftovers keep well refrigerated for three to four days and you can freeze individual slices for up to three months wrapped tightly.
My favorite aspect is how reliably this dessert elicits smiles across generations. The bright red inside always surprises guests who expect a cake and then find a luxuriously creamy filling instead. Over the years friends have called me for tips about preventing cracks and I tell them the same thing let the oven cool slowly and do not over bake.

Storage Tips
Store this dessert covered in the refrigerator for three to four days. Use plastic wrap directly on the surface to prevent the whipped cream topping from forming a crust and then cover the whole cake loosely with foil or a cake dome. For longer storage slice the cake and wrap individual portions tightly in plastic wrap then place them in a freezer safe container. Thaw overnight in the refrigerator before serving then refresh the top with a small dollop of whipped cream and a few fresh sprinkles for presentation. Avoid long term freezer storage beyond three months to maintain texture.
Ingredient Substitutions
If you need a gluten free base swap the Oreo crumbs for certified gluten free chocolate sandwich cookies or use a ground almond and cocoa crust at a ratio of one and a half cups ground nuts two tablespoons cocoa one quarter cup melted butter. For a lighter version try reduced fat cream cheese but know the texture will be less silky. If you prefer a more natural red color use beet powder or concentrated beet juice but add gradually because it can alter flavor. To reduce sugar by a small amount replace up to one quarter cup sugar with a sugar substitute suitable for baking keeping the rest as regular sugar to maintain texture.
Serving Suggestions
Serve with a generous swirl of lightly sweetened whipped cream and scatter mini cookies and sprinkles. Pair slices with hot coffee or a spiced tea to balance the rich creaminess. For an elegant buffet display cut into neat slices and plate with a small dusting of cocoa around the edge and a sprig of edible holly if available. This dessert also pairs nicely with a tart berry compote which cuts through the richness when guests prefer a brighter contrast.
Cultural Background
Red velvet has origins in classical southern baking where the cake became popular in the early twentieth century. The vivid color was originally the result of reaction between cocoa and acidic buttermilk and was enhanced by food coloring in later years. Combining that flavor profile with a creamy baked filling borrows from classic baked cheese custards found in many European traditions and American holiday tables. This hybrid celebrates both visual festivity and the comforting cream cheese profile beloved in many regions.
Seasonal Adaptations
For winter celebrations increase the cocoa by one additional teaspoon to deepen flavor and use winter spiced whipped cream with a pinch of cinnamon. For spring swap sprinkles for fresh berries and a lemon scented whipped cream. For a New Year twist add a splash of rum or vanilla liqueur to the filling during mixing about one tablespoon to complement the creamy texture and add complexity without overwhelming the holiday spices.
Meal Prep Tips
Make the crust and filling a day ahead then bake on the second day so the chilling time is concentrated overnight which frees up time on the day of your event. Whip the topping just before serving to preserve its airy texture. If you are transporting the cake place it in a shallow box with the pan secured to prevent sliding and keep it chilled with ice packs in a cooler until just before serving. Use a hot sharp knife wiped clean between cuts for neat plated portions.
This dessert is more than a treat it is a tradition that brings people together. Whether you keep it simple with sprinkles and mini cookies or dress it up for a formal holiday dinner the bright color and creamy texture make it memorable. Share a slice with friends and family and encourage them to try a second helping.
Pro Tips
Always use room temperature cream cheese for a lump free filling.
Wrap the springform pan tightly with heavy duty foil to prevent water seepage during the water bath.
Chill the cheesecake at least six to eight hours or overnight for the cleanest slices and best texture.
This nourishing christmas red velvet cheesecake recipe is sure to be a staple in your kitchen. Enjoy every moist, high protein slice — it is perfect for breakfast or as a wholesome snack any time.
FAQs about Recipes
Can I make this ahead
Yes you can prepare the crust and filling a day ahead then bake the next day. Chilling overnight after baking improves texture.
How do I get a vibrant red color
Use gel food coloring for a deep red color and add a little at a time until you reach your desired shade.
Tags
Christmas Red Velvet Cheesecake
This Christmas Red Velvet Cheesecake recipe makes perfectly juicy, tender, and flavorful steak every time! Serve with potatoes and a side salad for an unforgettable dinner in under 30 minutes.
Ingredients
Crust
Filling
Topping
Instructions
Prepare the pan and crust
Preheat oven to 350 degree Fahrenheit. Wrap a 9 inch springform pan tightly with heavy duty foil. Crush 24 Oreo cookies to fine crumbs and mix with one third cup melted butter and 2 tablespoons sugar. Press into the bottom of the pan and bake 8 to 10 minutes. Cool completely.
Make the filling
Beat four 8 ounce blocks cream cheese until smooth. Add one half cup sugar and mix until just combined. Stir in one teaspoon vanilla and two tablespoons cocoa powder then add red food coloring to achieve desired shade. Whip one cup heavy cream to soft peaks then fold into the cheese mixture along with one quarter cup sprinkles. Pour over cooled crust.
Bake in a water bath
Reduce oven to 325 degree Fahrenheit. Place the foil wrapped pan in a larger roasting pan and pour hot water into the roasting pan until it reaches halfway up the springform sides. Bake for one hour to one hour and fifteen minutes until edges are set and center jiggles slightly.
Cool and chill
Turn off the oven and leave the cheesecake inside with the door slightly open for one hour. Remove from the oven and water bath then cool on a wire rack for two to three hours. Run a knife around the edge to loosen then refrigerate at least six to eight hours or overnight.
Serve
Remove springform sides. Top with whipped cream garnish with mini Oreos and extra sprinkles. Use a hot sharp knife wiped clean between cuts for neat slices.
Last Step: Please leave a rating and comment letting us know how you liked this recipe! This helps our business to thrive and continue providing free, high-quality recipes for you.
Nutrition
Did You Make This?
Leave a comment & rating below or tag
@aiolirecipe on social media!
Categories:
You might also like...

Fall Harvest Pasta Salad
A cozy, colorful salad that celebrates autumn flavors — roasted butternut squash and Brussels sprouts tossed with pasta, cranberries, pecans, and tangy feta, finished with a balsamic vinaigrette.

Cilantro Lime Steak Bowls
Bright, tangy cilantro-lime marinated flank steak served over rice with black beans, corn, fresh veggies and creamy avocado for a fast, healthy weeknight bowl.

Pecan Pie Crescent Rolls
Buttery crescent rolls filled with a sweet pecan pie–inspired filling — a quick, crowd-pleasing dessert perfect for holidays or weeknight cravings.
Did You Make This?
Leave a comment & rating below or tag @aiolirecipe on social media!
Rate This Recipe
Share This Recipe
Enjoyed this recipe? Share it with friends and family, and don't forget to leave a review!
Comments (1)
This recipe looks amazing! Can't wait to try it.
Comments are stored locally in your browser. Server comments are displayed alongside your local comments.
Hi, I'm Olivia!
What's Popular

30-Minute Meals!
Join to receive our email series which contains a round-up of some of our quick and easy family favorite recipes.