
Christmas Rice Crispy Treats

Festive bite sized rice crispy balls coated in white chocolate and sprinkled with red, green, and white nonpareils. A simple, make ahead holiday favorite that dazzles at parties.
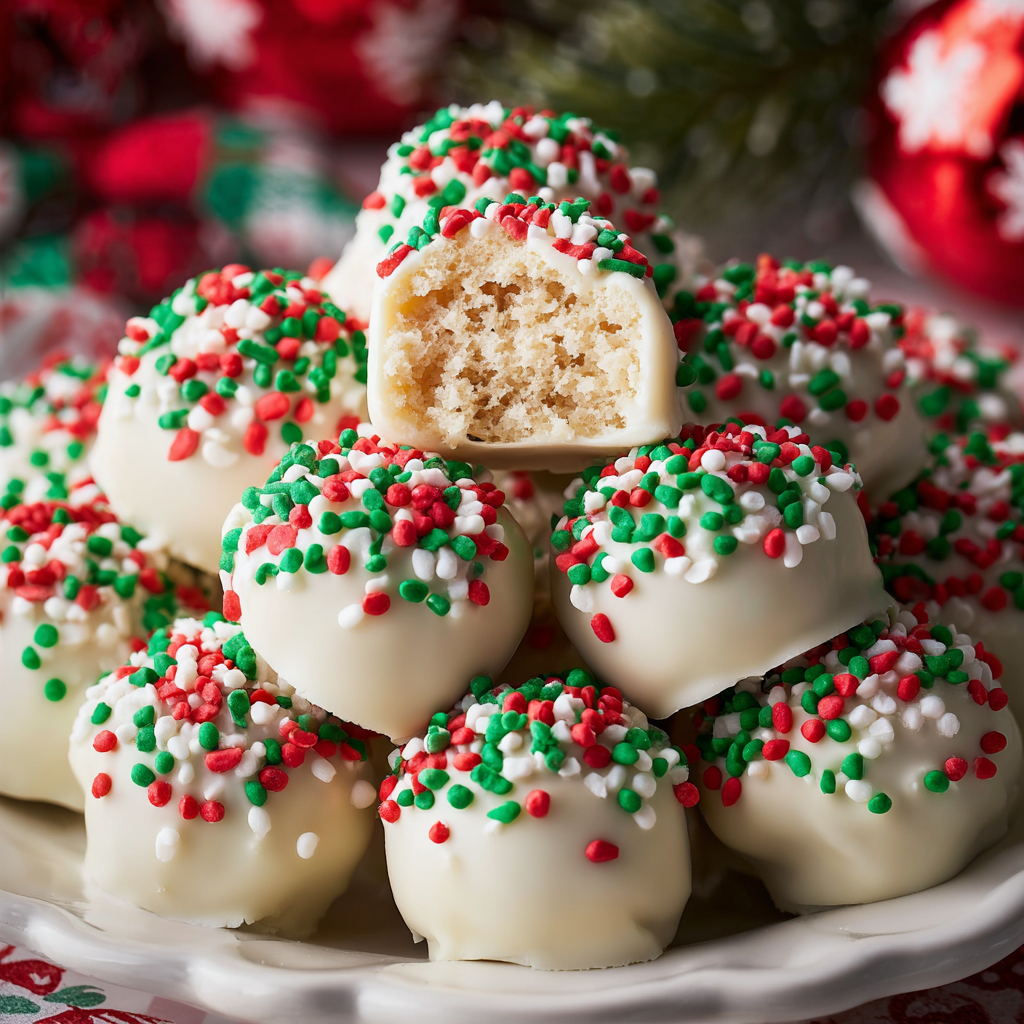
This recipe for Christmas Rice Crispy Treats has been my go to when I want something cheerful and easy to share during the holidays. I first made these on a snowy December afternoon when I needed a last minute dish for a neighborhood cookie swap. The combination of warm, slightly sticky puffed rice mixture rolled into small balls and then dipped in glossy white chocolate immediately felt like a holiday miracle. The crunch of the cereal gives way to soft marshmallow notes and the white chocolate adds a creamy finish that keeps everyone reaching for another.
What makes these treats special is their simplicity and their ability to be dressed up. A base of puffed rice and marshmallow is pantry friendly so you can assemble these at a moment notice. Rolling them into bite sized balls makes them easy to eat at a party and the festive sprinkles create instant holiday appeal without fuss. I love how the white chocolate sets into a delicate shell that gives a satisfying snap before the chewy center melts. Guests always comment on how nostalgic they are even though the coating makes them look polished and new.
Why You'll Love This Recipe
- Ready in about 30 minutes from start to finish so it works for last minute parties and school events.
- Uses pantry staples like puffed rice cereal and marshmallows which are easy to find year round.
- Make ahead friendly because the coated bites store well and travel without falling apart.
- Perfectly portioned as bite sized pieces so they are great for kids and cocktail parties alike.
- White chocolate coating makes them look professional while the sprinkles add festive color.
- Flexible recipe that adapts to dietary swaps like dairy free chocolate or flavored chips.
I remember serving these at a holiday brunch where my skeptical aunt ended up asking for the recipe. My cousin, who usually avoids sweets, kept a stack on his plate and told everyone how the white chocolate made them feel indulgent without being overly sweet. Over the years I have tweaked the marshmallow to cereal ratio to keep the center soft yet firm enough to roll. That little change made them far easier to dip and they have been a repeat request ever since.
Ingredients
- Puffed rice cereal 3 cups: Look for plain puffed rice such as plain Rice Krispies or store brand puffed rice. Avoid flavored or chocolate coated varieties because they will change the texture and sweetness.
- Mini marshmallows 1 1/2 cups: Use classic mini marshmallows or combine 1 cup mini marshmallows with 1/4 cup marshmallow fluff for extra creaminess. The fluff helps on dry days.
- Unsalted butter 4 tablespoons: Use real butter for flavor. Salted butter is fine if you prefer a touch of salt but reduce additional salt in other recipes served with these treats.
- Vanilla extract 1 teaspoon: Pure vanilla extract gives depth and rounds the sweetness. I prefer Nielsen Massey or other pure extracts for consistent flavor.
- White chocolate chips or candy melts 2 cups: Use good quality white chocolate chips or candy melts designed for coating. If using chips that are thicker when melted add a bit of coconut oil.
- Coconut oil 1 tablespoon optional: A small amount helps white chocolate become smoother and easier to dip. Use refined coconut oil if you want less coconut aroma.
- Nonpareil sprinkles 1/2 cup: Choose festive red, green, and white nonpareils. These add color and a tiny crunch and should be added immediately after coating so they adhere.
Instructions
Make the rice krispie mixture: In a large saucepan melt the butter over low heat. When melted add the mini marshmallows and the marshmallow fluff if using. Stir continuously with a heat safe spatula until everything is melted and smooth and there are no visible marshmallow bits. Remove from heat and stir in the vanilla. Fold in the puffed rice cereal gently until every piece is coated. Let the mixture rest for 2 to 3 minutes until warm but safe to handle. This short rest helps the mixture bind better when you shape it. Shape the balls: Lightly grease your hands with a little butter or cooking spray to prevent sticking. Pinch off about a tablespoonful and roll into balls about 1 to 1.5 inches in diameter. If the mixture feels crumbly press gently to compact it rather than overworking which can make them dense. Place each formed ball on a parchment lined baking sheet and continue until all mixture is used. Let balls cool completely to room temperature so the coating process is cleaner. Melt the white chocolate: Place white chocolate chips or candy melts in a microwave safe bowl. Heat in 20 to 30 second intervals stirring between each until melted and smooth. If the melted chocolate is thick stir in up to 1 tablespoon of coconut oil to loosen the texture. Allow the chocolate to sit for a minute or two so it cools and slightly thickens; this helps the coating stay on the balls rather than slide off. Coat the balls and add sprinkles: Using a fork or dipping tool lower each ball into the melted white chocolate until fully coated. Lift and tap the fork gently to remove excess. Return the coated ball to the parchment sheet and immediately sprinkle with red green and white nonpareils while the coating is still wet. Work in small batches so the chocolate does not set before you add the sprinkles. Set and serve: Let the coated balls set at room temperature or place the tray in the refrigerator for 15 to 20 minutes to speed the process. Once chocolate is firm transfer to a serving dish or airtight container. They stack nicely and will keep for several days when stored correctly.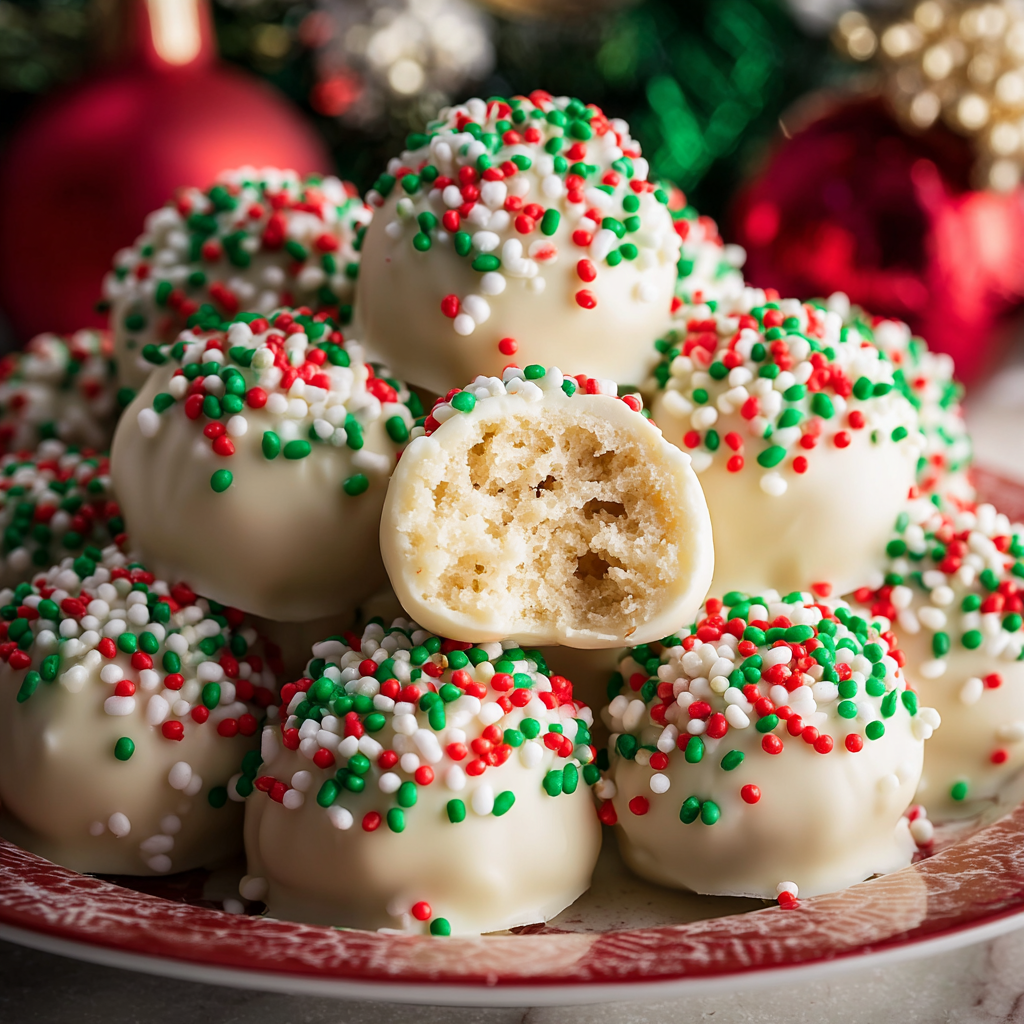
You Must Know
- These treats are easy to freeze for up to 3 months when wrapped individually and stored in an airtight container.
- The coated bites are high in simple carbohydrates and should be enjoyed as an occasional treat especially for children.
- To avoid sticking use parchment or wax paper and allow full chilling so coatings do not smudge while stacking.
- If serving to guests with allergies label them clearly because these contain dairy and gelatin depending on the marshmallows used.
My favorite part of this recipe is how well it travels. I once sent a container to a friend who was hosting a school party and they arrived still glossy and intact. Packing them in a single layer with parchment sheets between layers kept the sprinkles from rubbing off. The texture contrast between the crunchy exterior coating and the soft marshmallow center is what keeps people coming back for one more bite.

Storage Tips
Store cooled coated bites in an airtight container layered with parchment paper at room temperature for up to 3 days. For longer storage place them in the refrigerator where they will keep for up to 10 days but note refrigeration can make coated chocolate slightly dull in appearance. To freeze wrap each piece individually in plastic wrap then place in a resealable freezer bag for up to 3 months. Thaw overnight in the refrigerator and bring to room temperature before serving to restore the best texture.
Ingredient Substitutions
If you need a dairy free version use dairy free white chocolate or vegan candy melts and swap butter for a neutral oil based spread. To make them vegetarian check marshmallows for gelatin free options that use agar or pectin. For lower sugar swaps try sugar free marshmallows and a dark chocolate coating but expect a firmer center. Use gluten free labeled puffed rice to ensure they are safe for guests avoiding gluten.
Serving Suggestions
Arrange the bites on a tiered tray with a few whole cranberries and orange zest for a seasonal presentation. They pair well with hot chocolate or a lightly spiced coffee and make a great edible favor when packaged in cellophane and tied with ribbon. For a kid friendly platter add small bowls of extra sprinkles for guests to customize their own pieces before the coating sets.
Seasonal Adaptations
For a winter twist add a pinch of ground cinnamon to the melted white chocolate before dipping or swap the nonpareils for crushed peppermint candy. In summer use pastel sprinkles and melt white chocolate with a teaspoon of coconut extract for a tropical note. For Valentine events use red white and pink sprinkles and shape the mixture into hearts using a small cookie cutter before coating.
Meal Prep Tips
Make the puffed rice mixture one day ahead and shape the balls then store them covered in the refrigerator overnight. This helps them firm up and makes coating easier the next day. Melt the coating just before dipping so it is glossy and smooth. Work in batches of twelve to maintain consistent coating temperature and sprinkle immediately for best adhesion.
These festive bites are simple to make and joyful to share. Whether for a cookie exchange, school treat, or family gathering they bring color and nostalgia to the table. Try a batch this holiday and make the recipe your own with different coatings and decorations.
Pro Tips
Lightly grease hands with butter or cooking spray to prevent sticking while rolling.
Let shaped balls cool completely before dipping to prevent the coating from sliding off.
Add up to 1 tablespoon of coconut oil to white chocolate for a smoother melt and better coating consistency.
Work in small batches when dipping to keep the chocolate at the ideal viscosity for coating.
This nourishing christmas rice crispy treats recipe is sure to be a staple in your kitchen. Enjoy every moist, high protein slice — it is perfect for breakfast or as a wholesome snack any time.
FAQs about Recipes
Can I freeze these treats?
Yes these can be frozen for up to 3 months. Wrap individually and place in a resealable freezer bag to protect the sprinkles and coating.
How do I make them vegetarian?
Use gelatin free marshmallows or marshmallow fluff labeled vegetarian. Check packaging to confirm ingredients.
Tags
Christmas Rice Crispy Treats
This Christmas Rice Crispy Treats recipe makes perfectly juicy, tender, and flavorful steak every time! Serve with potatoes and a side salad for an unforgettable dinner in under 30 minutes.
Instructions
Make the rice krispie mixture
Melt butter over low heat then add mini marshmallows and marshmallow fluff if using. Stir until fully melted and smooth. Remove from heat and stir in vanilla. Fold in puffed rice cereal until coated. Let cool for 2 to 3 minutes.
Shape the balls
Grease hands lightly and roll mixture into 1 to 1.5 inch balls using about a tablespoon of mixture each. Place on a parchment lined sheet and cool completely.
Melt white chocolate
Melt white chocolate chips or candy melts in 20 to 30 second intervals stirring between rounds. Stir in up to 1 tablespoon coconut oil if too thick. Let sit briefly to slightly thicken.
Coat and sprinkle
Dip each ball using a fork until coated then tap off excess. Return to parchment and immediately add nonpareil sprinkles so they adhere before the chocolate sets.
Set and store
Allow to set at room temperature or refrigerate for 15 to 20 minutes until firm. Store in an airtight container layered with parchment for up to 3 days at room temperature or up to 10 days refrigerated.
Last Step: Please leave a rating and comment letting us know how you liked this recipe! This helps our business to thrive and continue providing free, high-quality recipes for you.
Nutrition
Did You Make This?
Leave a comment & rating below or tag
@aiolirecipe on social media!
Categories:
You might also like...

Fall Harvest Pasta Salad
A cozy, colorful salad that celebrates autumn flavors — roasted butternut squash and Brussels sprouts tossed with pasta, cranberries, pecans, and tangy feta, finished with a balsamic vinaigrette.

Cilantro Lime Steak Bowls
Bright, tangy cilantro-lime marinated flank steak served over rice with black beans, corn, fresh veggies and creamy avocado for a fast, healthy weeknight bowl.

Pecan Pie Crescent Rolls
Buttery crescent rolls filled with a sweet pecan pie–inspired filling — a quick, crowd-pleasing dessert perfect for holidays or weeknight cravings.
Did You Make This?
Leave a comment & rating below or tag @aiolirecipe on social media!
Rate This Recipe
Share This Recipe
Enjoyed this recipe? Share it with friends and family, and don't forget to leave a review!
Comments (1)
This recipe looks amazing! Can't wait to try it.
Comments are stored locally in your browser. Server comments are displayed alongside your local comments.
Hi, I'm Olivia!
What's Popular

30-Minute Meals!
Join to receive our email series which contains a round-up of some of our quick and easy family favorite recipes.