
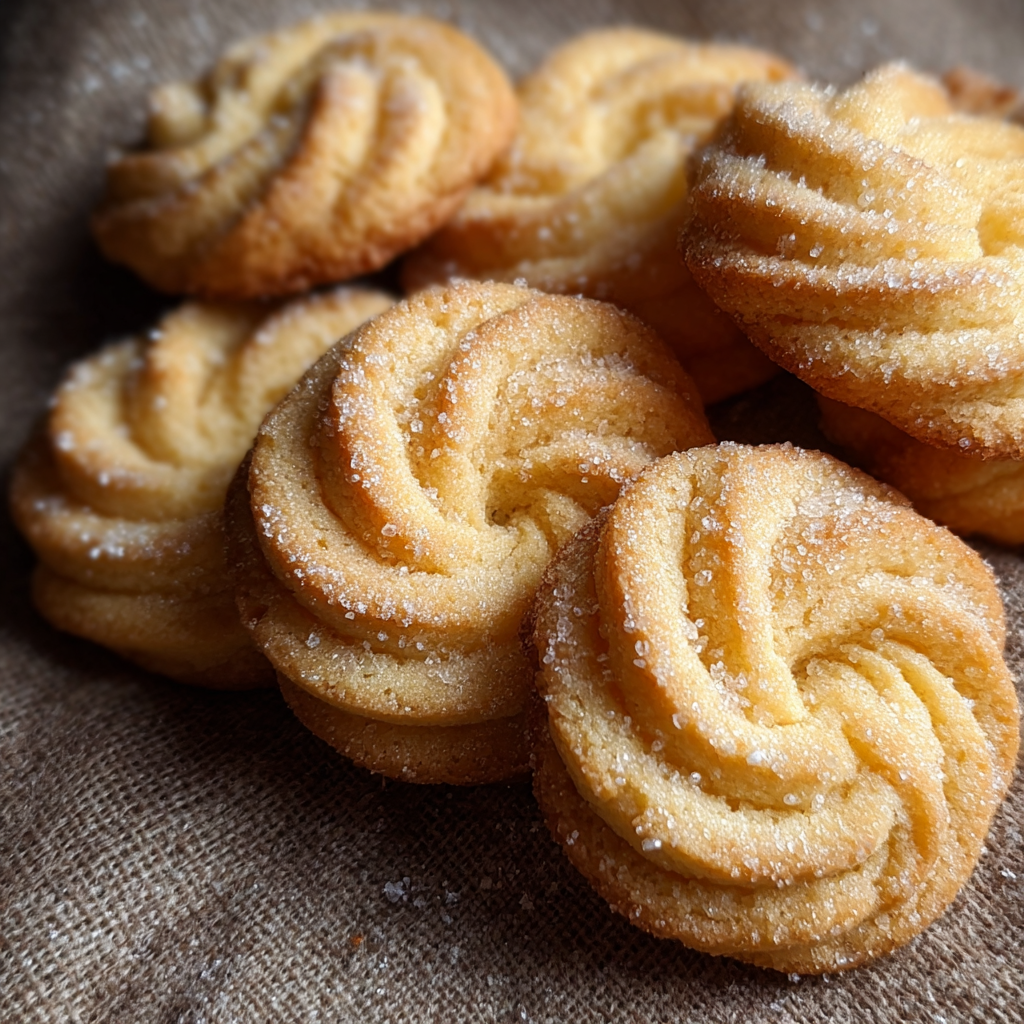
Classic Danish Butter Cookies

Buttery, melt-in-your-mouth Danish cookies piped into pretty shapes — crisp edges, tender centers, and a hint of vanilla. Perfect for gifting or a comforting tea-time treat.
This recipe for Danish butter cookies has been my holiday and teatime secret for years. I first learned the basic proportions from a little tin of imported cookies and then set out to recreate that delicate crispness and rich buttery flavor at home. I discovered the right balance of sugar, cornstarch and careful creaming one winter afternoon when I wanted something special for a neighbor visit, and the result was a batch that disappeared before I could finish stacking them on a plate.
What makes these cookies special is the texture: a light, crumbly snap at the edges that gives way to a tender, almost shortbread-like center. The vanilla lifts the butter without overpowering it, and piping them with a star tip creates those classic ridges that crisp up beautifully in the oven. I often make a double batch and freeze portions of shaped dough for quick baking later — friends always think they’re store-bought, and the aroma that fills the kitchen while they bake is impossible to resist.
Why You'll Love This Recipe
- Simple ingredient list using pantry staples: unsalted butter, sugar, egg, flour, cornstarch and vanilla — no exotic items required, so you can bake these anytime.
- Quick preparation and predictable baking: about 15 minutes active work and 12 to 15 minutes in the oven, making it ideal for last-minute gifts or a fast dessert.
- Versatile shaping and finishing: pipe with a star tip for classic ridges, or roll and cut for shapes; sprinkle with extra sugar for sparkle.
- Make-ahead friendly: dough can be chilled or frozen; baked cookies store well and can be wrapped for gifting.
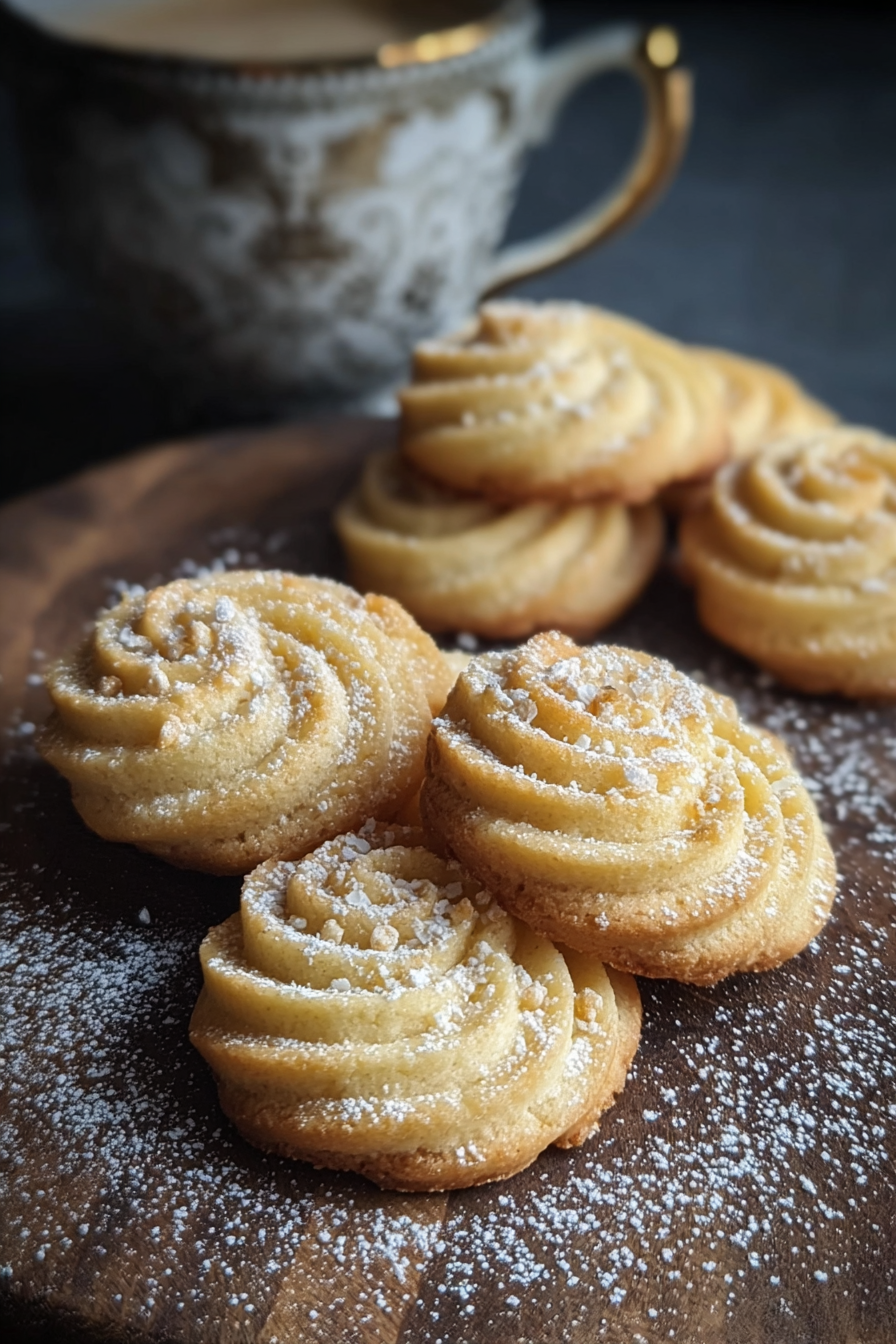
- Crowd-pleasing texture: crisp edges and buttery interior appeal to both children and adults, and the simple vanilla profile pairs with coffee or tea.
I remember bringing a tin to a block party once and watching a neighbor take one bite and reach for a second — then ask for the recipe. Seeing everyone savoring those little ridged cookies and swapping stories made me realize how small comforts connect us. Baking a batch feels like a quiet tradition that I can pass on.
Ingredients
- Unsalted butter (1 cup): Use high-quality European-style butter if you can (brands like Plugra or Kerrygold) for a richer flavor and creamier mouthfeel. Soften to room temperature but do not melt; properly softened butter traps air during creaming, giving lighter cookies.
- Granulated sugar (3/4 cup): Provides sweetness and structure; superfine sugar will dissolve faster and yield a slightly smoother texture, but standard granulated sugar works perfectly.
- Large egg (1): Acts as a binder and adds a touch of richness. Use an extra-large only if your eggs are unusually small — the dough should come together but not be wet.
- All-purpose flour (2 cups): The backbone of the dough; spoon and level your measuring cup to avoid packing. For slightly more tender cookies, you can mix half all-purpose and half pastry flour.
- Vanilla extract (1 teaspoon): Pure vanilla extract is preferable to imitation for depth of flavor; add at room temperature to avoid shocking the butter.
- Salt (1/4 teaspoon): Enhances the butter and balances sweetness — do not omit unless using salted butter, in which case reduce slightly.
- Cornstarch (2 tablespoons): Key for that delicate, almost melt-in-your-mouth texture. Cornstarch softens the gluten network and lightens the cookie.
- Extra sugar for sprinkling (optional): Granulated or coarse sugar adds sparkle and an extra crisp surface when desired.
Instructions
Prepare and preheat:Preheat the oven to 350°F (175°C). Line two baking sheets with parchment paper so the bottoms brown evenly and cleanup is easy. Allow the softened butter to sit at room temperature for 20 to 30 minutes if not already soft.Cream butter and sugar:In a large bowl, beat the softened butter with the granulated sugar using a hand mixer or stand mixer fitted with the paddle attachment. Beat on medium speed for about 2 to 3 minutes until the mixture is light, fluffy and pale — this incorporates air that improves texture. Scrape down the bowl halfway through to ensure even creaming.Add egg and vanilla:Beat in the large egg and vanilla extract until fully combined and smooth, about 30 seconds. The mixture may look slightly curdled — that’s normal. Avoid overbeating once the flour is added to prevent a tough cookie.Mix dry ingredients:In a separate bowl, whisk together the all-purpose flour, cornstarch and salt until evenly distributed. Sifting is optional but helps eliminate lumps and makes blending easier.Combine to form dough:Gradually add the dry ingredients to the wet mixture on low speed, mixing until just combined and a soft dough forms. Stop as soon as there are no visible streaks of flour — overmixing develops gluten and will change the desired tender texture.Shape the cookies:Transfer the dough to a piping bag fitted with a large star tip and pipe 1.5-inch rosettes or short logs onto the prepared baking sheets, leaving about 1.5 to 2 inches between cookies. If you prefer, drop tablespoons of dough for a simpler shape. Sprinkle lightly with extra sugar if desired.Bake and cool:Bake in the preheated oven for 12 to 15 minutes, rotating the pans once halfway through if your oven has hot spots. Look for the edges to turn a light golden color while centers remain pale — this preserves tenderness. Let cool on the baking sheet for 5 minutes before transferring to a wire rack to cool completely.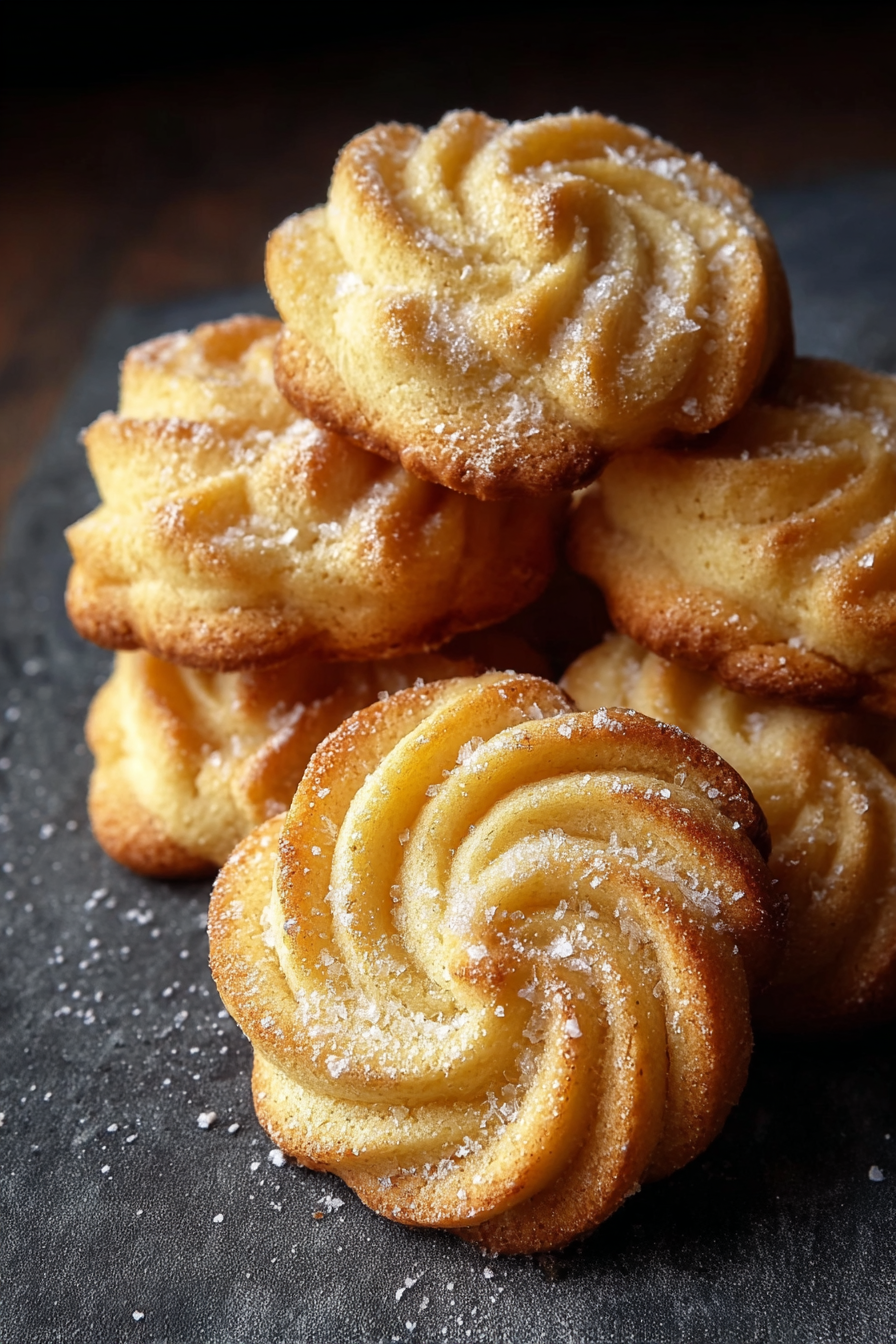
You Must Know
- These cookies freeze well at the shaped-dough stage for up to 3 months; bake straight from frozen, adding 2 to 4 minutes to the baking time.
- High in fat and moderate in sugar, each cookie contains about 130 calories; store-bought tins often include extra stabilizers so homemade versions are purer in flavor.
- Use parchment or a silicone mat to prevent bottoms from over-browning; thin cookie sheets will brown faster.
- Because of the cornstarch, the texture is tender — avoid substituting potato starch which can alter crispness.
My favorite part of these cookies is the ritual of piping and watching the ridges brown into delicate, golden edges. Friends often tell me they taste nostalgic, and I think that’s because the combination of butter and vanilla triggers cozy memories of holiday baking. I love tucking a few into a small waxed-paper bag tied with ribbon and watching people smile when they open it.
Storage Tips
Store fully cooled cookies in an airtight container at room temperature for up to one week to maintain crisp edges and tender centers. Layer parchment between layers to prevent sticking. For longer storage, freeze baked cookies in a single layer on a tray until firm, then transfer to a freezer-safe container for up to three months. To revive slightly stale cookies, warm them at 300°F (150°C) for 3 to 5 minutes; watch closely to avoid browning. Shaped dough freezes even better: pipe onto a tray, freeze until solid, then bag for baking later.
Ingredient Substitutions
If you’re adapting for dietary needs, use a high-quality vegan butter and a flax “egg” (1 tablespoon ground flaxseed + 3 tablespoons water) to make them dairy-free and egg-free, though texture will be slightly different and you may need to chill the dough before piping. For a lighter crumb, substitute up to 50 percent of the all-purpose flour with pastry flour. If you don’t have cornstarch, use arrowroot powder in the same amount; potato starch is not recommended. To reduce sweetness slightly, lower the sugar to 2/3 cup, keeping the structure intact.
Serving Suggestions
Serve these with strong coffee, Earl Grey tea, or a lightly sweet hot chocolate. For a special touch, sandwich two cookies together with a thin layer of raspberry jam or chocolate ganache. They make elegant gifts when stacked in a decorative tin with tissue paper. For a dessert platter, include a variety of cookies and seasonal fruit; the cookies’ simple vanilla-butter profile balances richer chocolate or spiced treats.
Cultural Background
Butter cookies are closely associated with Northern European baking traditions, prized for their pure ingredients and butter-forward flavor. Although many countries have their own versions, the classic ridged, piped shape has become synonymous with Danish tins sold worldwide. The simplicity of the formula — butter, sugar, flour — is a hallmark of Scandinavian baking where high-quality butter and straightforward techniques create refined results.
Seasonal Adaptations
In winter, add a pinch of ground cardamom or finely grated orange zest to the dough for festive warmth. For summer, fold a teaspoon of lemon zest into the batter and dust with powdered sugar after baking. Around holidays, press a whole almond into the center before baking or dip half the cooled cookie in melted dark chocolate and sprinkle with sea salt for contrast. Small changes in zest or spices transform the basic dough into a seasonal favorite.
Meal Prep Tips
Make a double batch and freeze half of the piped shapes on a baking tray. Once frozen, pack them into labeled freezer bags; when needed, place frozen shapes on parchment and bake from frozen, adding a couple of minutes to the time. This lets you serve freshly baked cookies with minimal effort. Store baked cookies in airtight tins, but keep softer items like jam-filled cookies separate to preserve crispness.
These cookies have become a small ritual in my kitchen — piping, baking, and sharing. They’re simple, forgiving, and endlessly adaptable, which is why I always keep the ingredients on hand. Make them your own, and don’t be surprised if they become someone else’s favorite too.
Pro Tips
Use room-temperature butter (not melted) to ensure proper creaming and lighter texture.
Spoon and level flour when measuring to avoid dense cookies from packed flour.
Pipe cookies directly onto parchment to avoid handling and preserve delicate shapes.
Chill the piping bag briefly if the dough becomes too soft while working.
Bake until edges are lightly golden; centers should remain pale for tender cookies.
This nourishing classic danish butter cookies recipe is sure to be a staple in your kitchen. Enjoy every moist, high protein slice — it is perfect for breakfast or as a wholesome snack any time.
Tags
Classic Danish Butter Cookies
This Classic Danish Butter Cookies recipe makes perfectly juicy, tender, and flavorful steak every time! Serve with potatoes and a side salad for an unforgettable dinner in under 30 minutes.
Ingredients
Cookies
Instructions
Preheat and prepare
Preheat oven to 350°F (175°C). Line two baking sheets with parchment paper. Ensure butter is softened but not melted.
Cream butter and sugar
Beat softened butter with granulated sugar on medium speed for 2 to 3 minutes until light and fluffy, scraping down the bowl once.
Add egg and vanilla
Beat in the large egg and vanilla until combined, about 30 seconds. Mixture may look slightly curdled which is normal.
Whisk dry ingredients
In a separate bowl, whisk together all-purpose flour, cornstarch and salt to distribute evenly.
Combine to form dough
Gradually add dry ingredients to the wet mixture on low speed, mixing until just combined into a soft dough.
Pipe and bake
Transfer dough to a piping bag with a large star tip and pipe 1.5-inch rosettes onto prepared sheets. Sprinkle sugar if desired. Bake 12 to 15 minutes until edges are lightly golden. Cool on sheet 5 minutes then transfer to a wire rack.
Last Step: Please leave a rating and comment letting us know how you liked this recipe! This helps our business to thrive and continue providing free, high-quality recipes for you.
Nutrition
Did You Make This?
Leave a comment & rating below or tag
@aiolirecipe on social media!
Categories:
You might also like...

Fall Harvest Pasta Salad
A cozy, colorful salad that celebrates autumn flavors — roasted butternut squash and Brussels sprouts tossed with pasta, cranberries, pecans, and tangy feta, finished with a balsamic vinaigrette.

Cilantro Lime Steak Bowls
Bright, tangy cilantro-lime marinated flank steak served over rice with black beans, corn, fresh veggies and creamy avocado for a fast, healthy weeknight bowl.

Pecan Pie Crescent Rolls
Buttery crescent rolls filled with a sweet pecan pie–inspired filling — a quick, crowd-pleasing dessert perfect for holidays or weeknight cravings.
Did You Make This?
Leave a comment & rating below or tag @aiolirecipe on social media!
Rate This Recipe
Share This Recipe
Enjoyed this recipe? Share it with friends and family, and don't forget to leave a review!
Comments (1)
This recipe looks amazing! Can't wait to try it.
Comments are stored locally in your browser. Server comments are displayed alongside your local comments.
Hi, I'm Olivia!
What's Popular

30-Minute Meals!
Join to receive our email series which contains a round-up of some of our quick and easy family favorite recipes.