
Little Debbie Christmas Tree Cake Truffles (Easy No-Bake)

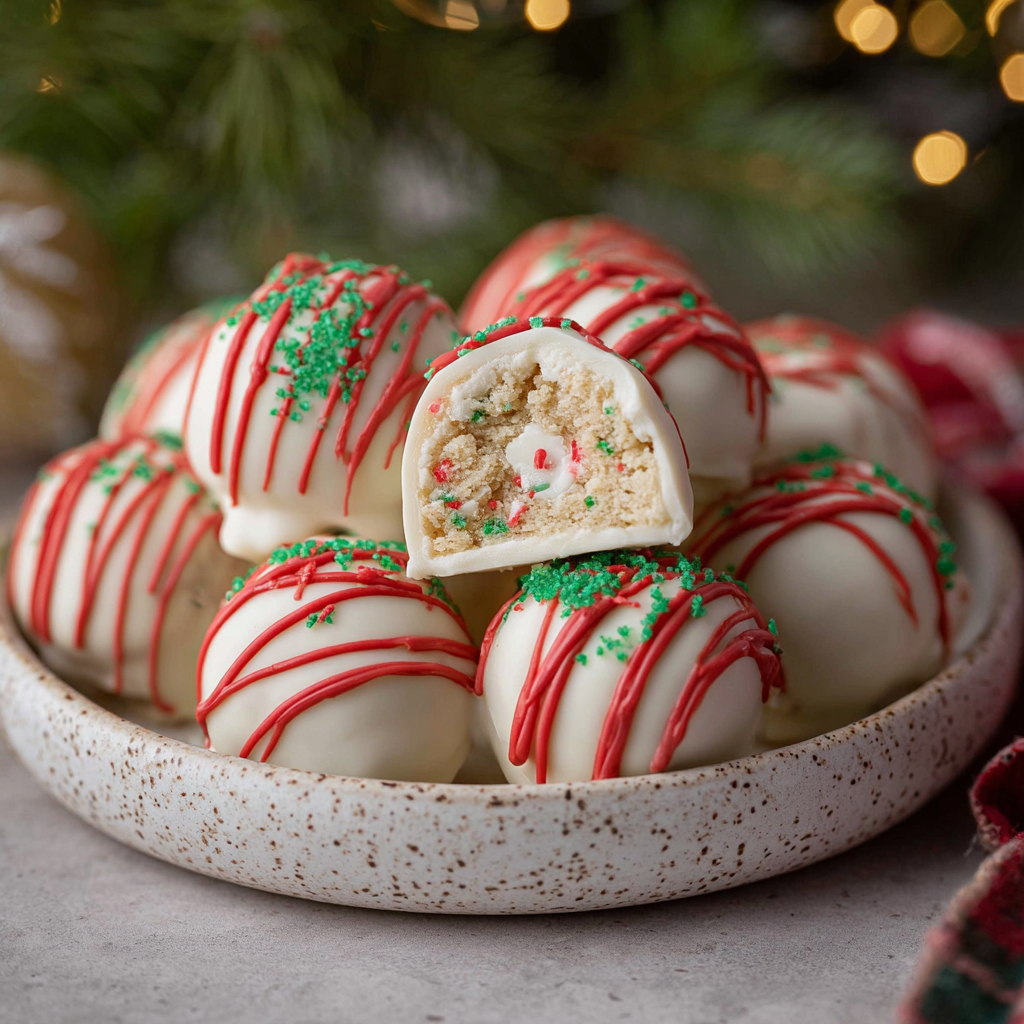
Transform Little Debbie Christmas Tree Cakes into festive no-bake truffles coated in white chocolate, drizzled with red, and finished with green sanding sugar—perfect for holiday parties and gifting.
This Little Debbie Christmas Tree Cake truffle idea started as a last-minute hostess gift a few holiday seasons ago when I realized I had a box of tree cakes and no time to bake. I wanted something nostalgic, quick, and crowd-pleasing that echoed holiday colors without fuss. The first batch I made was met with surprise and delight: the soft cake and creamy filling become intensely more indulgent when rolled into bite-sized truffles and coated with glossy white chocolate. It felt like unwrapping a familiar childhood treat in a new, grown-up format.
These no-bake truffles celebrate texture and nostalgia: the cake interior becomes a moist, pliable center while the white chocolate shell adds a crisp snap. The red drizzle and green sanding sugar turn each piece into a miniature ornament on the dessert table. I love that the process is forgiving—if the mixture is too wet, a few minutes in the fridge firms it up; if too dry, a teaspoon of melted white chocolate brings it together. They store well and travel easily, which makes them my go-to for last-minute parties and cookie exchanges.
Why You'll Love This Recipe
- Speed: Ready in about 30 minutes from start to finish—no oven required, ideal for busy holiday schedules.
- Accessibility: Uses one boxed treat as the base and a few pantry items like white chocolate and sprinkles.
- Make-ahead friendly: You can form the centers a day ahead and finish with the coating the next day.
- Crowd-pleasing: Familiar childhood flavor elevated into elegant bite-sized pieces that disappear at parties.
- Customizable: Swap colors or toppings to match any party theme, and they freeze well for future use.
- Minimal equipment: A mixer, bowl, and baking sheet are all you need—no specialty tools required.
My family treats these like little festive candies. The first time I made them my aunt insisted I write down the steps, and my neighbor requested them for two separate holiday gatherings. They bridge the gap between nostalgic convenience and homemade charm, and that surprise reaction from guests keeps me making them every season.
Ingredients
- Little Debbie Christmas Tree Cakes (1 box, 5 cakes): The soft cake and cream filling are the backbone. Look for the freshest box at the store; the texture affects how easily the mixture forms into balls.
- White chocolate or white candy melts (8 ounces): Use a reputable brand like Ghirardelli chips for a rich finish or Wilton candy melts for easy melting and stability when decorating.
- Festive sprinkles (3 tablespoons): Small nonpareils or mixed holiday sprinkles work best—avoid large shapes that can prevent smooth rolling.
- Red candy melts (3 tablespoons, optional): For the decorative drizzle. Choose a reliable brand and melt slowly to maintain a glossy finish.
- Green sanding sugar (to decorate): A light dusting adds sparkle and texture. You only need a tablespoon or two depending on how many truffles you make.
- Optional tools: Parchment paper, a tablespoon or small cookie scoop, and a fork or dipping tool make the process quicker and cleaner.
Instructions
Unwrap and Break Down: Remove all wrappers from the five cakes and place pieces into a large mixing bowl. Break the cakes into smaller chunks with your hands so the mixer can process them evenly; this takes 1–2 minutes and prevents lumping. Process to Crumbs: Use a handheld mixer on low to medium speed to crumble the cakes until the texture resembles coarse bread crumbs with visible flecks of filling. This usually takes 30–45 seconds; scrape down the bowl once to ensure even mixing. Incorporate Sprinkles: Add 3 tablespoons of festive sprinkles and gently fold them into the cake crumbs by hand or on low speed. The sprinkles disperse color without altering consistency; if the mixture feels too sticky, chill for 5–10 minutes. Form Balls: Use a tablespoon or small cookie scoop to portion the mixture. Roll each portion between your palms to form smooth 1-inch balls. Place them on a parchment-lined baking sheet. If the mixture sticks to your hands, lightly dampen them or chill the tray while forming. Chill the Centers: Refrigerate the formed balls for at least 15 minutes to firm them up before dipping. Well-chilled centers create a cleaner coat of chocolate and reduce the chance of them falling apart during dipping. Melt the White Chocolate: Melt 8 ounces of white chocolate or candy melts in 20–30 second bursts in a microwave-safe bowl, stirring between each burst. Alternatively, use a double boiler over simmering water and stir until smooth. Keep the chocolate warm but not hot; overheating causes graininess. Dip the Truffles: Using a fork or dipping tool, submerge each chilled ball in the white chocolate, lifting and tapping gently to remove excess. Return to the parchment-lined sheet. Work quickly so the centers stay firm and the coating sets smoothly. Melt and Drizzle Red Candy: Melt 3 tablespoons of red candy melts in a small microwave-safe container in 20–30 second intervals, massaging until fluid. Transfer to a piping or zip-top bag, snip a tiny corner, and drizzle over the set white-coated truffles for a festive look. Decorate and Set: While the drizzle is still tacky, sprinkle green sanding sugar over the tops. Chill the finished truffles for 5–10 minutes until the coating is completely set. Store in an airtight container in the fridge until serving.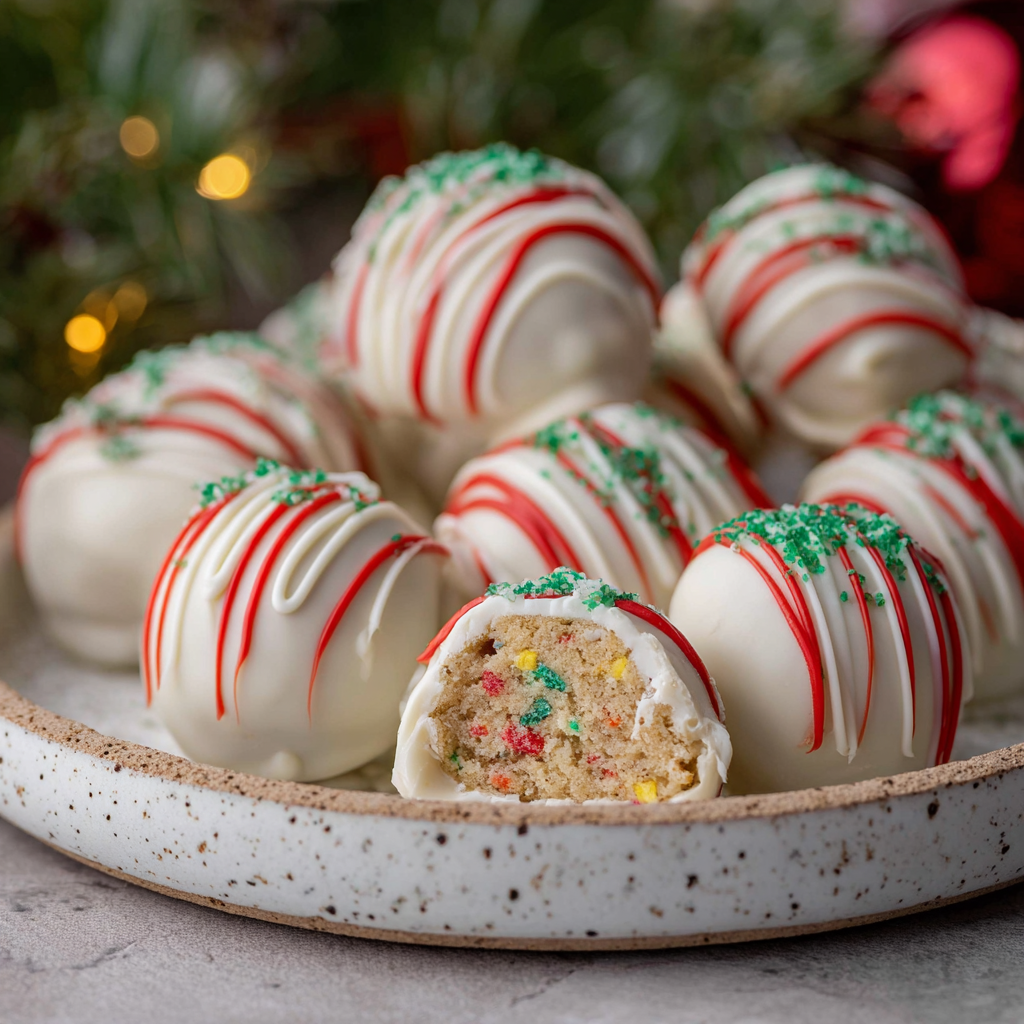
You Must Know
- Texture: Chilling the centers is essential—warm centers cause the chocolate to crack or slide off.
- Storage: Keep truffles refrigerated in a single layer for up to 5 days; freeze for up to 3 months wrapped tightly.
- Allergens: Contains wheat, milk, and soy from the packaged cakes and chocolate—see allergy notes below.
- Make-ahead: You can shape the centers 24 hours ahead and dip the day of serving for fresher chocolate shine.
My favorite aspect is how quickly the recipe turns something ordinary into a thoughtful, sharable bite. At a cookie swap, these were the first to go because they combine a nostalgic flavor with a sophisticated look—people assume you spent hours, when in reality most of the effort is chilling. It’s the perfect trick for holiday entertaining when time and oven space are limited.

Storage Tips
Store finished pieces in an airtight container in a single layer or separated with parchment paper to prevent sticking. In the refrigerator they will keep for up to five days—bring them to room temperature for 10–15 minutes before serving to soften the shell slightly. For longer storage, freeze in a shallow airtight container for up to three months; thaw in the fridge overnight and then rest at room temperature to remove any condensation before serving for the best texture and shine.
Ingredient Substitutions
If you prefer a different base, substitute any packaged snack cake with a similar profile; avoid overly dry cakes. Swap white chocolate for milk or dark chocolate for a richer coating—remember color contrast may change, and drizzles will stand out differently. If you need dairy-free options, use certified dairy-free candy melts and verify the cakes are vegan-friendly. For gluten-free versions, find a certified gluten-free snack cake and gluten-free candy coating. Adjust sprinkle sizes to maintain rollability: tiny nonpareils disperse best.
Serving Suggestions
Arrange on a festive platter with small mint leaves or edible gold stars for visual interest. These pair beautifully with hot cocoa or mulled cider at a holiday gathering. For gifting, place in mini paper liners inside a decorative box with tissue paper. Serve chilled or at cool room temperature; if serving outdoors on a warm day, keep them shaded and on ice packs to prevent melting.
Cultural Background
These truffles are a modern, playful twist on American convenience desserts—transforming packaged holiday snacks into handcrafted confections reflects a larger trend of remixing nostalgic treats. The Little Debbie brand has been a staple in American lunch boxes since mid-20th century, and repurposing those items into homemade bites creates a communal, comforting bridge between packaged and artisanal holiday foods.
Seasonal Adaptations
Change colors and toppings to match seasons: swap red drizzle and green sugar for pastel colors at spring parties, or use orange and black for Halloween. For winter gatherings, dust with pearlized sugar or edible glitter. Add finely chopped peppermint candy inside the centers for extra holiday flavor, or incorporate a teaspoon of instant espresso into the mixture for a grown-up note.
Meal Prep Tips
Form the centers up to 24 hours ahead and store covered in the refrigerator. Melt and temper chocolate on the day of serving for the best shine, or use candy melts for a shortcut. Portion truffles into small containers for grab-and-go snacks, and label with the date. Use disposable piping bags for easy cleanup when drizzling. These steps save time on busy entertaining days while preserving quality.
These little bites are a tiny labor of love that deliver maximum holiday cheer. Whether made for a neighbor, a cookie swap, or a cozy night in, they’re simple to execute and fun to personalize. Enjoy sharing them as much as eating them—happy holidays and joyful baking!
Pro Tips
Chill the formed centers for at least 15 minutes before dipping to ensure the coating adheres cleanly.
Melt chocolate in short bursts in the microwave and stir thoroughly to avoid overheating and graininess.
Use a small cookie scoop or tablespoon to portion even truffles for consistent size and presentation.
Work in small batches when dipping to keep chocolate at the right temperature for coating.
If the chocolate thickens, microwave briefly in 10-second bursts and stir to restore fluidity.
This nourishing little debbie christmas tree cake truffles (easy no-bake) recipe is sure to be a staple in your kitchen. Enjoy every moist, high protein slice — it is perfect for breakfast or as a wholesome snack any time.
FAQs about Recipes
Can I make the centers ahead of time?
Yes—formed centers can be refrigerated up to 24 hours before dipping. Keep them covered to avoid drying out.
How long can I freeze them?
Freeze in a single layer until solid, then transfer to an airtight container for up to 3 months. Thaw overnight in the refrigerator.
Tags
Little Debbie Christmas Tree Cake Truffles (Easy No-Bake)
This Little Debbie Christmas Tree Cake Truffles (Easy No-Bake) recipe makes perfectly juicy, tender, and flavorful steak every time! Serve with potatoes and a side salad for an unforgettable dinner in under 30 minutes.
Ingredients
Main
Instructions
Unwrap and prepare
Remove all wrappers and break the five cakes into smaller pieces inside a large mixing bowl so they process evenly.
Crumble cakes
Use a handheld mixer on low to medium speed to crumble the cakes until you achieve coarse crumbs with bits of filling visible.
Add sprinkles
Fold in 3 tablespoons of festive sprinkles by hand or on low speed to distribute color without changing texture.
Portion & roll
Spoon tablespoon-sized portions and roll between palms to form 1-inch balls, placing them on parchment-lined baking sheet.
Chill centers
Refrigerate the formed balls for at least 15 minutes so they firm up and hold their shape during dipping.
Melt white chocolate
Melt 8 ounces of white chocolate or candy melts in 20–30 second intervals, stirring between bursts until smooth.
Dip truffles
Using a fork or dipping tool, submerge each chilled ball, remove excess coating, and return to the parchment-lined sheet to set.
Drizzle & decorate
Melt red candy melts, transfer to a piping bag, drizzle over truffles, then sprinkle with green sanding sugar. Chill until set.
Last Step: Please leave a rating and comment letting us know how you liked this recipe! This helps our business to thrive and continue providing free, high-quality recipes for you.
Nutrition
Did You Make This?
Leave a comment & rating below or tag
@aiolirecipe on social media!
Categories:
You might also like...

Fall Harvest Pasta Salad
A cozy, colorful salad that celebrates autumn flavors — roasted butternut squash and Brussels sprouts tossed with pasta, cranberries, pecans, and tangy feta, finished with a balsamic vinaigrette.

Cilantro Lime Steak Bowls
Bright, tangy cilantro-lime marinated flank steak served over rice with black beans, corn, fresh veggies and creamy avocado for a fast, healthy weeknight bowl.

Pecan Pie Crescent Rolls
Buttery crescent rolls filled with a sweet pecan pie–inspired filling — a quick, crowd-pleasing dessert perfect for holidays or weeknight cravings.
Did You Make This?
Leave a comment & rating below or tag @aiolirecipe on social media!
Rate This Recipe
Share This Recipe
Enjoyed this recipe? Share it with friends and family, and don't forget to leave a review!
Comments (1)
This recipe looks amazing! Can't wait to try it.
Comments are stored locally in your browser. Server comments are displayed alongside your local comments.
Hi, I'm Olivia!
What's Popular

30-Minute Meals!
Join to receive our email series which contains a round-up of some of our quick and easy family favorite recipes.