
Mini Christmas Cheesecakes

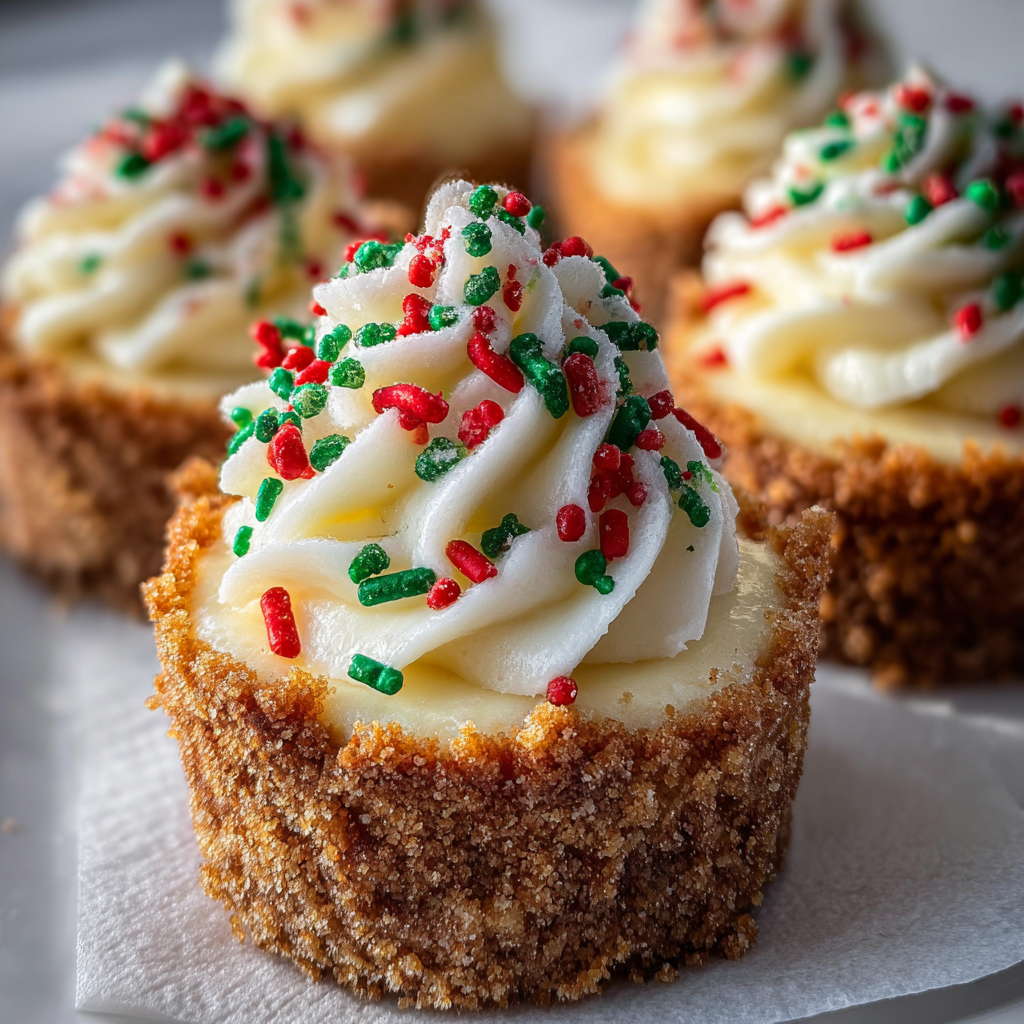
Creamy, festive mini cheesecakes with a buttery graham cracker crust, topped with red and green sprinkles — perfect for holiday parties and easy to make ahead.
This festive batch of mini cheesecakes has been my holiday secret for years. I first developed the recipe during a December potluck when I wanted something small, portable, and utterly crowd-pleasing — something that felt special without requiring hours in the kitchen. These individual treats marry a silky cream cheese filling with a crisp, buttery graham cracker base. They are elegant enough for guests but simple enough to make on a weeknight when you’re juggling shopping lists and wrapping paper.
I remember the first time my family tried them: the room quieted while everyone savored the first bite, and then the chorus of “Can I have another?” began. The filling is tangy from sour cream and smooth from full-fat cream cheese; the texture sets just firm enough to hold its shape while remaining luxuriously creamy on the tongue. Red and green sprinkles make each mini cheesecake instantly festive — they’re my small touch of holiday cheer that turns plain desserts into seasonal favorites.
Why You'll Love This Recipe
- Easy to scale: makes about 12 mini cheesecakes and can be doubled for a larger crowd without changing the technique.
- Quick preparation: active prep time is roughly 20 minutes and baking is just 20 minutes, so it’s ready to chill in under an hour.
- Uses pantry staples: cream cheese, sugar, eggs, sour cream and graham crackers — most of which I usually have on hand during the holidays.
- Perfect for make-ahead: prepare the night before and refrigerate for at least 2 hours; they keep well for parties and travel in a cooler.
- Crowd-pleasing presentation: individual portions are easier to serve and the colorful sprinkles add instant festive appeal.
- Kid-friendly assembly: pressing the crust and spooning filling are great tasks for little helpers at holiday gatherings.
Every holiday I save a corner of the counter for these because they disappear fast. Guests love how creamy they are, and I love that they’re portable — I’ve wrapped trays for neighborhood cookie swaps and they travel without fuss. Making them became a ritual: I put on holiday music, enlist someone to press crusts into liners, and the kitchen fills with the scent of butter and sugar as we chat and sip cider.
Ingredients
- Cream cheese (8 oz): Use full-fat, brick-style cream cheese (such as Philadelphia) for the creamiest texture; let it sit at room temperature so it whips smooth without lumps.
- Sugar (1/2 cup): Granulated sugar balances the tang of cream cheese and sour cream; for a slightly finer texture, you can use superfine sugar.
- Vanilla extract (1 tsp): Pure vanilla extract adds aromatic depth — avoid imitation for best flavor.
- Sour cream (1/2 cup): Adds tang and silkiness; full-fat sour cream yields the richest mouthfeel, but light will work if needed.
- Eggs (2 large): Room-temperature eggs incorporate more evenly and help the filling set without cracking or curdling.
- Crushed graham crackers (1/4 cup): Use finely crushed crackers for a cohesive crust; you can process whole crackers in a food processor or place them in a sealed bag and crush with a rolling pin.
- Melted butter (1/4 cup): Unsalted butter melted and cooled slightly binds the crumbs and browns in the oven for a flavorful base.
- Red and green sprinkles (to decorate): Choose small jimmies or nonpareils that sit well on the chilled surface — add just before serving to prevent bleeding.
Instructions
Preheat the oven: Set your oven to 325°F (160°C). This moderate temperature allows the filling to set gently, preventing the center from cracking while the edges firm up. Position a rack in the center of the oven for even heat distribution and allow the oven to fully preheat before baking. Prepare the crust: Combine 1/4 cup crushed graham crackers with 1/4 cup melted butter in a small bowl until the crumbs are evenly coated and hold together when pressed. Press about 1 teaspoon of the mixture into the bottom of each mini cupcake liner (use a standard 12-cup muffin tin) to form a compact base. Use the bottom of a shot glass or a small measuring cup to get a uniform thickness. Make the filling: In a medium bowl, use an electric mixer on low speed to beat 8 oz softened cream cheese with 1/2 cup sugar until completely smooth and no lumps remain. Add 1 teaspoon vanilla extract and 1/2 cup sour cream, mixing until combined. Add the eggs one at a time, mixing briefly after each addition — overmixing at high speed incorporates air and can cause cracks, so mix just until smooth. Assemble the minis: Divide the filling evenly among the prepared cups, filling each to about three-quarters full. Tap the tin gently on the counter to release any trapped air bubbles and to level the surfaces, which helps achieve uniform baking. Bake until set: Bake in the preheated oven for approximately 20 minutes. Check for doneness by gently nudging the pan — the centers should be slightly wobbly but not liquid. A toothpick inserted near the center should come out mostly clean with a few moist crumbs. Avoid overbaking to keep the interior creamy. Cool and chill: Remove the tin from the oven and let the minis cool at room temperature for 30–45 minutes, then transfer the pan to the refrigerator and chill for at least 2 hours to fully set. Chilling strengthens the texture and makes removal from liners neater. Decorate and serve: Once chilled, peel off the liners and sprinkle each mini with red and green sprinkles just before serving. Store leftovers in an airtight container in the refrigerator for up to 4 days.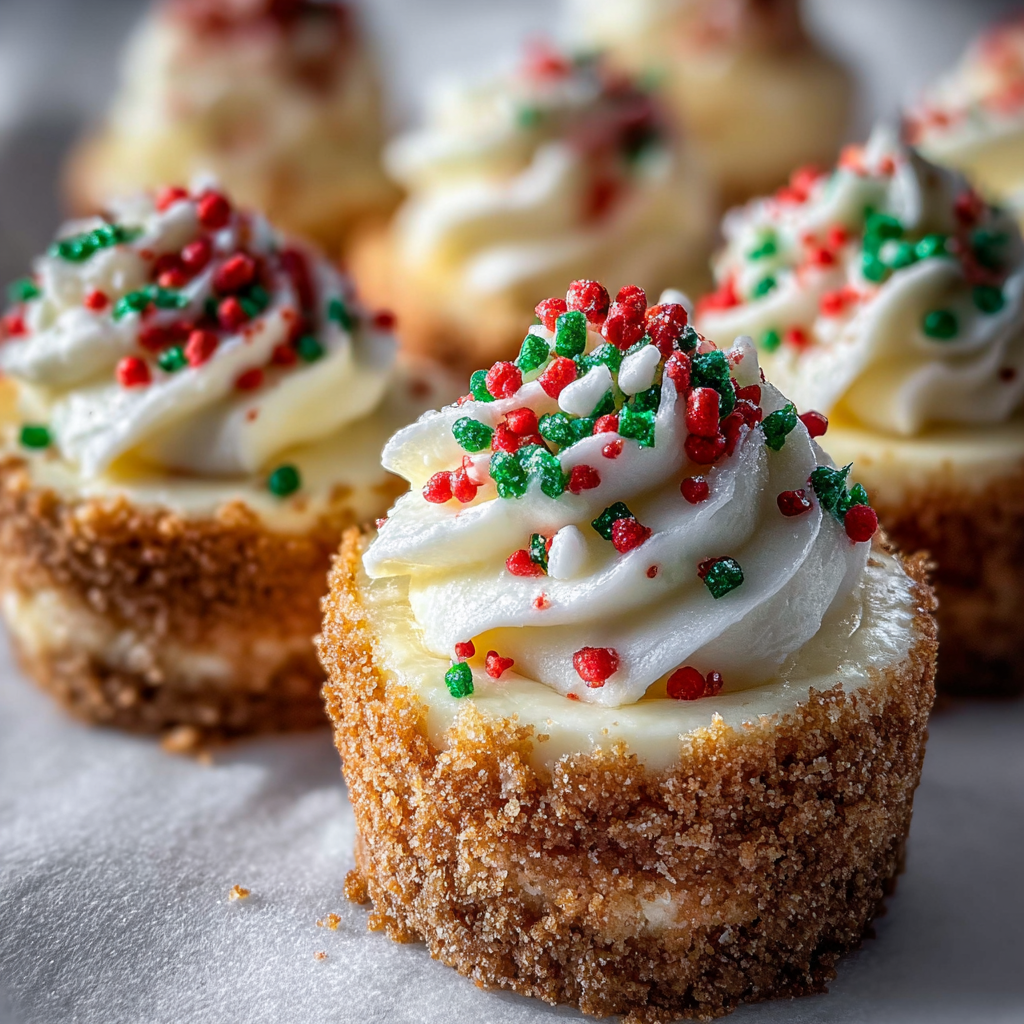
You Must Know
- These hold well in the refrigerator for up to 4 days and freeze well for up to 3 months; thaw in the fridge before serving.
- Because the filling is dairy-heavy, these are not dairy-free or vegan; they are vegetarian-friendly but contain eggs and gluten from the crust.
- Chilling for at least 2 hours is essential for a clean slice and proper set — rushing this step can cause a soft center that won’t hold its shape.
- Press the crust firmly and keep the butter proportion accurate; too much butter yields a greasy crust, too little and it will be crumbly.
- For travel, place in a single layer in an airtight container with parchment between layers and keep cool with ice packs for up to 4 hours.
My favorite thing about these minis is their portability — they’ve been to family movie nights, office parties and the annual cookie swap. One year I packaged a dozen for a neighbor who had just moved in; she called later and said they were the best welcome gift. The simple decoration always sparks joy: red and green sprinkles turn a small dessert into a festive centerpiece.
Storage Tips
Store chilled in an airtight container in the refrigerator for up to 4 days. If you need longer storage, freeze them on a tray until solid, then transfer to a freezer-safe bag for up to 3 months. To thaw, move them to the refrigerator for several hours or overnight; avoid microwaving as it will alter the texture. For best results, add sprinkles right before serving since moisture can cause colors to bleed. Use parchment or cupcake separators if stacking to prevent sticking and preserve smooth surfaces.

Ingredient Substitutions
If you need a gluten-free option, swap store-bought gluten-free graham crackers or use finely crushed nuts (almonds or pecans) mixed with the butter for a nutty crust — you may need slightly less butter to avoid sogginess. For a lighter version, use reduced-fat cream cheese and sour cream, though texture will be less luxurious. For a tangier profile, replace half the sugar with maple syrup and reduce other liquid slightly. To make them egg-free, use a commercially available egg replacer designed for baking, but expect a softer set that requires extra chilling time.
Serving Suggestions
Serve these with a small spoonful of cranberry compote or a smear of raspberry jam for a bright contrast. They pair nicely with hot coffee or mulled cider at holiday gatherings. For a buffet, present them on a tiered tray with little picks so guests can grab and go. Garnish with a tiny mint leaf for a fresh note, or for adults, drizzle a bit of orange liqueur reduction for a festive boozy touch.
Cultural Background
Cheesecakes have a long history stretching back to ancient Greece as celebratory food, evolving across Europe into many regional versions. The American-style cheesecake, with its smooth cream cheese base, became popular in the 20th century after the invention of cream cheese in New York. Making mini versions for holidays draws on the tradition of bite-size sweets for parties and potlucks — individual portions reduce mess and emphasize variety, a hallmark of modern festive spreads.
Seasonal Adaptations
For winter holidays, top with sugared cranberries or candied orange slices in place of sprinkles. In summer, swap sprinkles for fresh berry compote and a light lemon zest for brightness. For Christmas morning, warm a few gently in the oven (200°F/95°C for 5 minutes) and serve with whipped cream for a cozy treat. Use autumn spices like cinnamon and nutmeg in the crust for a Thanksgiving twist.
Meal Prep Tips
Make the crust and filling a day ahead: press crusts and store the assembled but unbaked tin covered in the fridge, then bake the next day for fresher texture. Alternatively, bake, chill, and freeze — they thaw quickly and are perfect for planned entertaining. Label containers with the date and flavors if you make variations. Use silicone liners for easy release, or grease paper liners lightly for neater presentation when unwrapping.
These mini cheesecakes are simple, dependable, and packed with holiday cheer. Whether you’re feeding a crowd or gifting neighbors, they’re a small, elegant bite that feels homemade and special. Give them a try this season — I bet they’ll become part of your holiday ritual too.
Pro Tips
Bring cream cheese and eggs to room temperature before mixing to avoid lumps and overworking.
Press the crust firmly using the bottom of a measuring cup for uniform bases.
Chill the cheesecakes for at least 2 hours — longer chilling improves texture and makes peeling liners easier.
Avoid overmixing the filling to reduce air bubbles that can crack the surface during baking.
This nourishing mini christmas cheesecakes recipe is sure to be a staple in your kitchen. Enjoy every moist, high protein slice — it is perfect for breakfast or as a wholesome snack any time.
FAQs about Recipes
Can I make these ahead and freeze them?
Yes — they can be frozen for up to 3 months. Freeze on a tray until solid, then transfer to a sealed bag; thaw in the refrigerator before serving.
How do I avoid lumpy filling or cracked tops?
Use room-temperature cream cheese and eggs for a smooth, lump-free filling. Mix on low speed and avoid overbeating which adds air and can cause cracks.
Tags
Mini Christmas Cheesecakes
This Mini Christmas Cheesecakes recipe makes perfectly juicy, tender, and flavorful steak every time! Serve with potatoes and a side salad for an unforgettable dinner in under 30 minutes.
Ingredients
Filling
Crust
Decoration
Instructions
Preheat oven
Preheat the oven to 325°F (160°C) and position a rack in the center for even heat. Allow the oven to reach full temperature before baking.
Prepare crust
Combine 1/4 cup crushed graham crackers with 1/4 cup melted butter until the crumbs hold together. Press approximately 1 teaspoon into the bottom of each lined cup using the bottom of a small measuring cup.
Mix filling
Beat 8 oz softened cream cheese with 1/2 cup sugar until smooth. Add 1 tsp vanilla and 1/2 cup sour cream, then incorporate the eggs one at a time on low speed until just combined to avoid excess air.
Assemble
Divide the filling among the prepared cups, filling about three-quarters full. Tap the pan to release air bubbles and level the surfaces before baking.
Bake
Bake for about 20 minutes until centers are slightly jiggly but mostly set. A toothpick inserted should come out with a few moist crumbs. Avoid overbaking to keep the texture creamy.
Cool and chill
Allow to cool at room temperature for 30–45 minutes, then refrigerate for at least 2 hours to fully set. Peel liners off and add sprinkles just before serving.
Last Step: Please leave a rating and comment letting us know how you liked this recipe! This helps our business to thrive and continue providing free, high-quality recipes for you.
Nutrition
Did You Make This?
Leave a comment & rating below or tag
@aiolirecipe on social media!
Categories:
You might also like...

Fall Harvest Pasta Salad
A cozy, colorful salad that celebrates autumn flavors — roasted butternut squash and Brussels sprouts tossed with pasta, cranberries, pecans, and tangy feta, finished with a balsamic vinaigrette.

Cilantro Lime Steak Bowls
Bright, tangy cilantro-lime marinated flank steak served over rice with black beans, corn, fresh veggies and creamy avocado for a fast, healthy weeknight bowl.

Pecan Pie Crescent Rolls
Buttery crescent rolls filled with a sweet pecan pie–inspired filling — a quick, crowd-pleasing dessert perfect for holidays or weeknight cravings.
Did You Make This?
Leave a comment & rating below or tag @aiolirecipe on social media!
Rate This Recipe
Share This Recipe
Enjoyed this recipe? Share it with friends and family, and don't forget to leave a review!
Comments (1)
This recipe looks amazing! Can't wait to try it.
Comments are stored locally in your browser. Server comments are displayed alongside your local comments.
Hi, I'm Olivia!
What's Popular

30-Minute Meals!
Join to receive our email series which contains a round-up of some of our quick and easy family favorite recipes.